Need a little extra space for decor in your living room? We decided to make a thin table that hides behind the couch! This way you have space for your phone, books, and some table lamps.
It is important to note, that the measurements for each couch table is different, so all measurements need to be customized if you want to make a table specific to your couch.
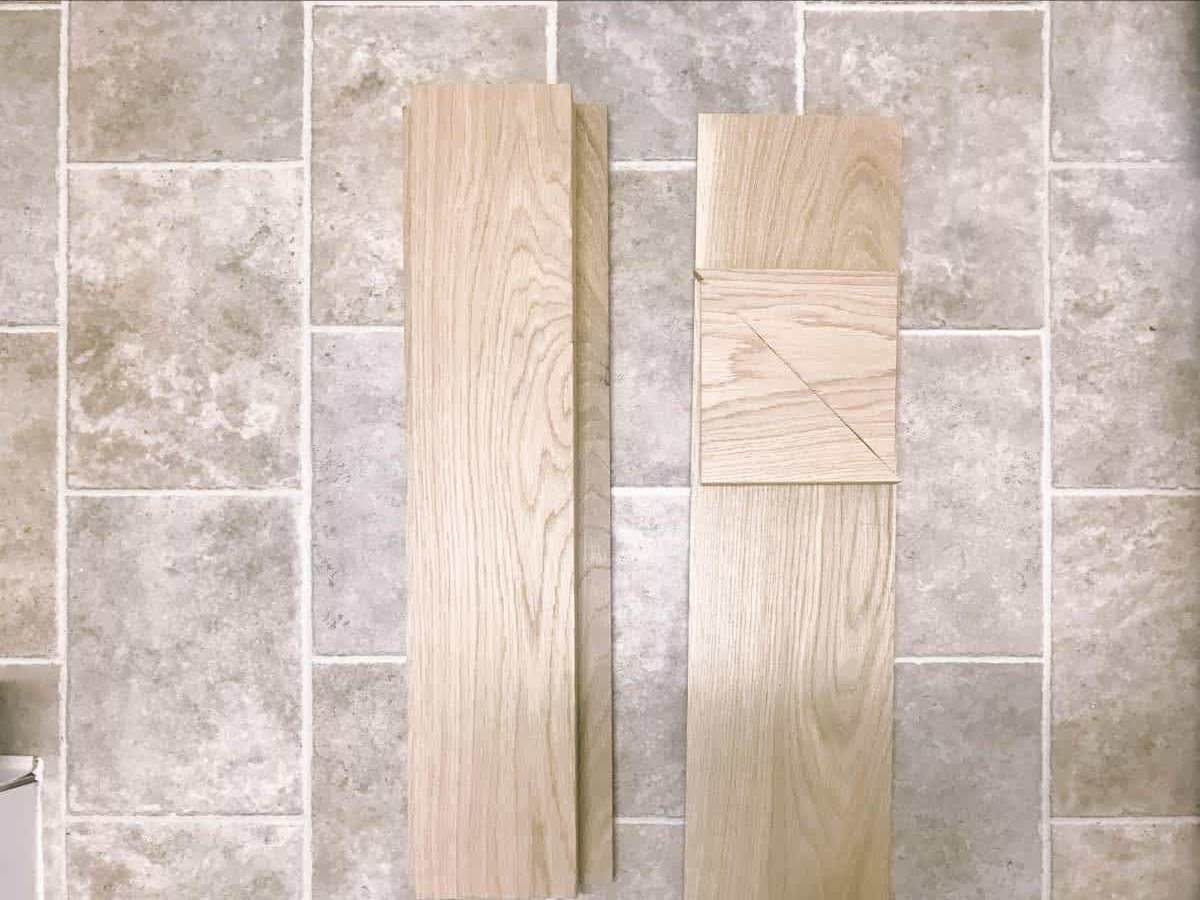
The first thing I did was to cut a 1x8 into a 90 inch piece for the table top. The legs are 1x8’s that have been trimmed into 5 ½ inches wide. I did this so the lip of the table would rest on top of the couch back. Then the center stabilizing leg is cut to the same height as the legs. I then cut some right triangles to help stabilize the side legs.
You will also need:
- Sander
- Sand paper (180 grit and 220 grit)
- 6 small L-Brackets
- ¾ inch screws
- A drill
- Gorilla glue wood glue
- Large clamps
Below is an illustration of how all the pieces should look when assembled.
The first step is to sand everything down. I did this using a 180 grit paper, then sanding again with a 220 grit paper. I wanted this table to be really smooth so there is no way for anything to catch on splintered wood. Make sure to completely wipe off all sawdust from the wood before continuing.
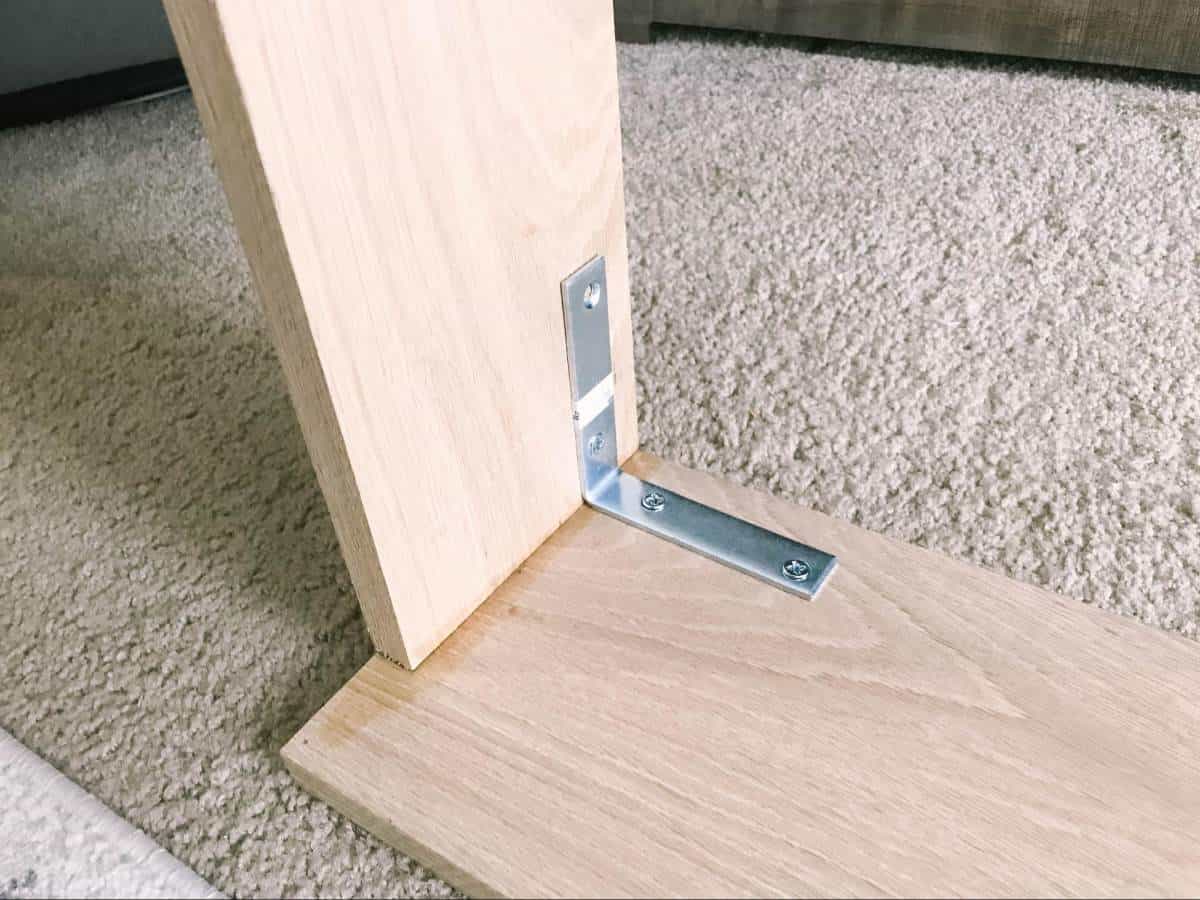
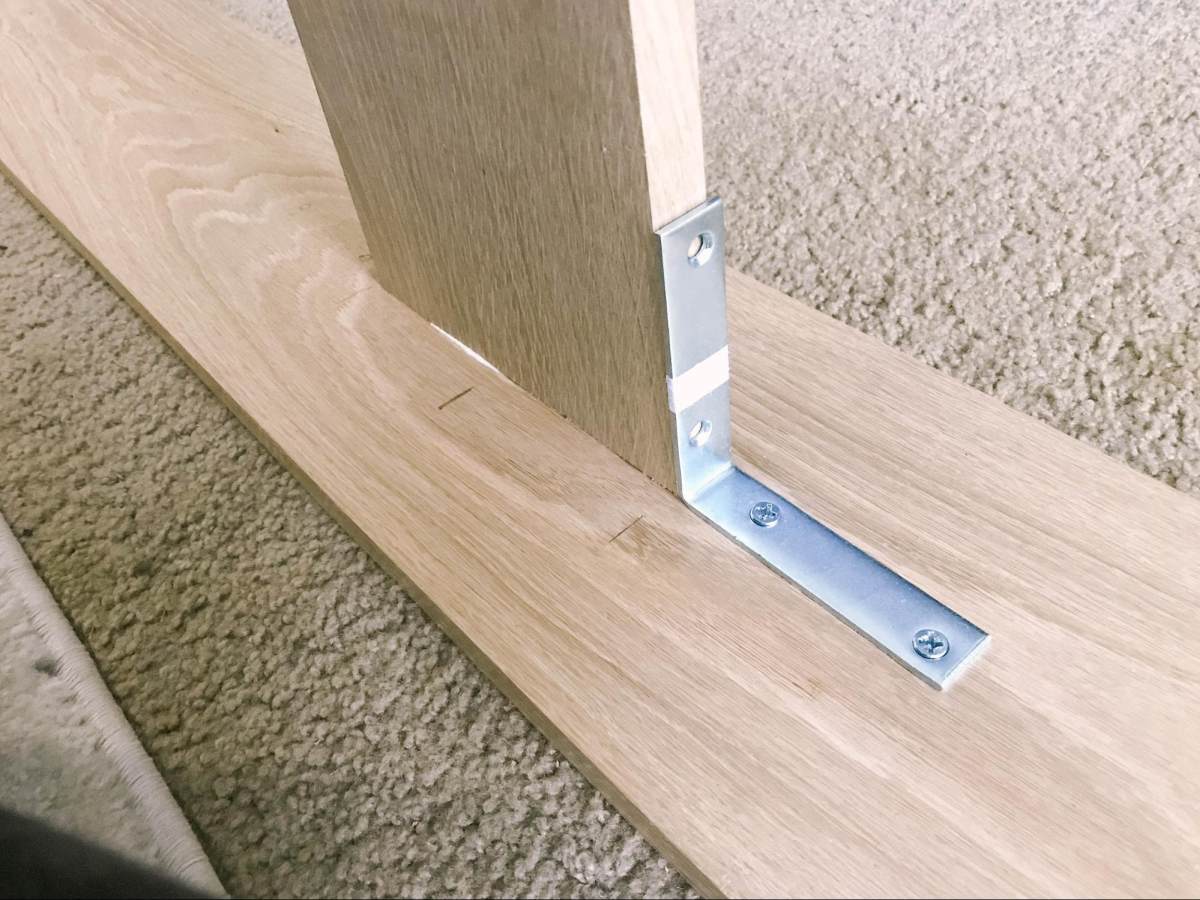
After sanding, apply wood glue to attach the legs. Let the glue dry before adding the L-Brackets. Make sure not to use so much wood glue that it spills out from the sides. Once the glue is dry, start to add the L brackets. This will stabilize the legs so you can add the triangle pieces next.
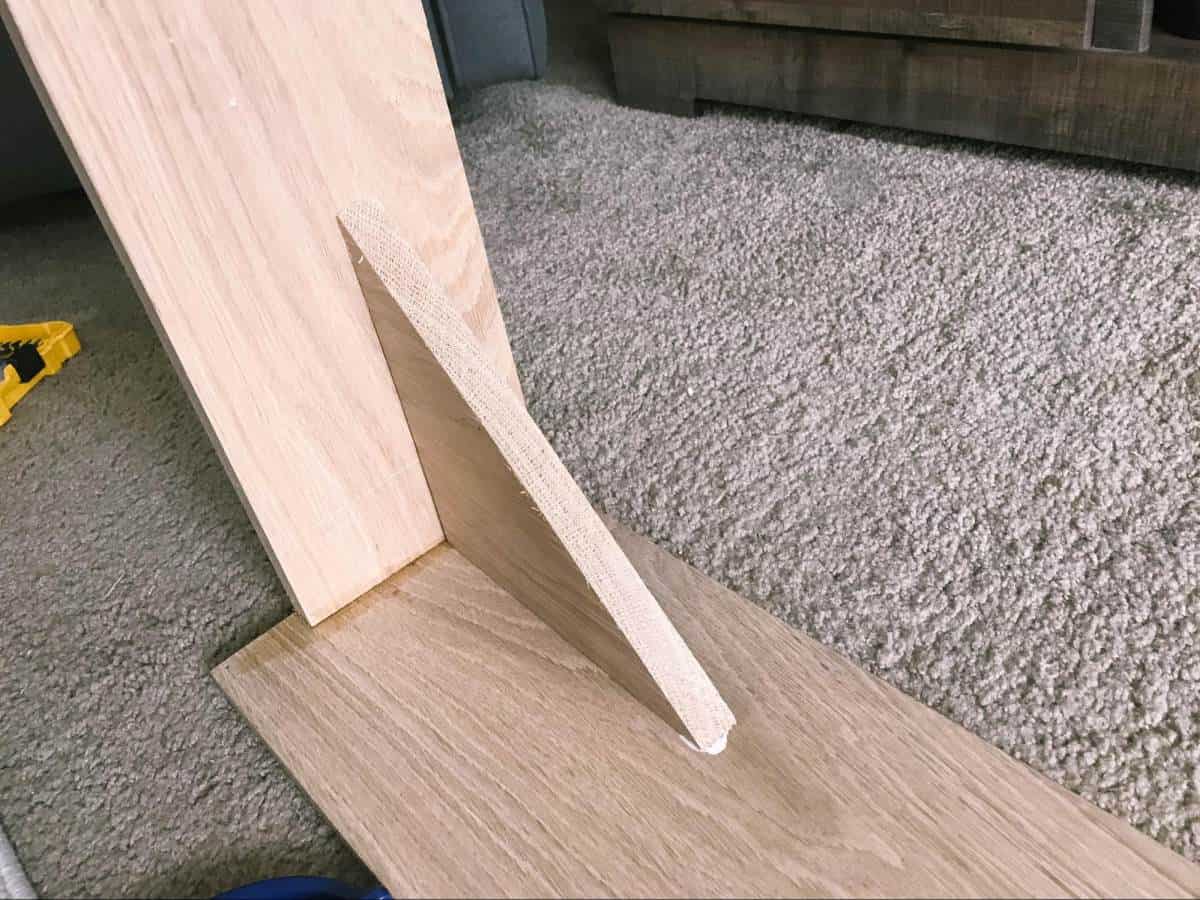
Once the L-bracket isattached on one side, glue in the triangular piece. Use a clamp to hold it tightly against the corner. It is important to wipe excess glue off of the edges of the boards. Let the glue dry completely as these pieces will not be screwed in at all. Once the triangular piece has set, add your second L-bracket. Repeat the process on both sides.
Once both of the side legs are done, we are adding a leg in the middle to help stabilize the table. This assures that you can set things on the table without it sagging in the center. Measure the direct center of the board, and add the 1x8 leg with glue. Once the glue has set, add the L-brackets to the side of the board.
Once all of the screws are in and the glue has set, you have a very simple table that can be put right behind your couch! Simply flip it over and add your decor! Outlets can be added to the table if desired as well. The finished product is definitely worth the time! Now the table should hide right behind the couch and takes up minimal space while providing a new area for decor.