
Do your insides twist like a pretzel every time you toss food scraps into the trash when they could be doing something beneficial? Do you live where you have limited space for composting? Are you a newbie with a curiosity about composting? Are you a garden enthusiast? If you answered yes to one or all of the above, this blog is for you! We will go over basics for a rookie composter and how to make your own compost in a trash can.
Things you will need to make trash can composter:
- Trash can ( can be plastic or aluminum)
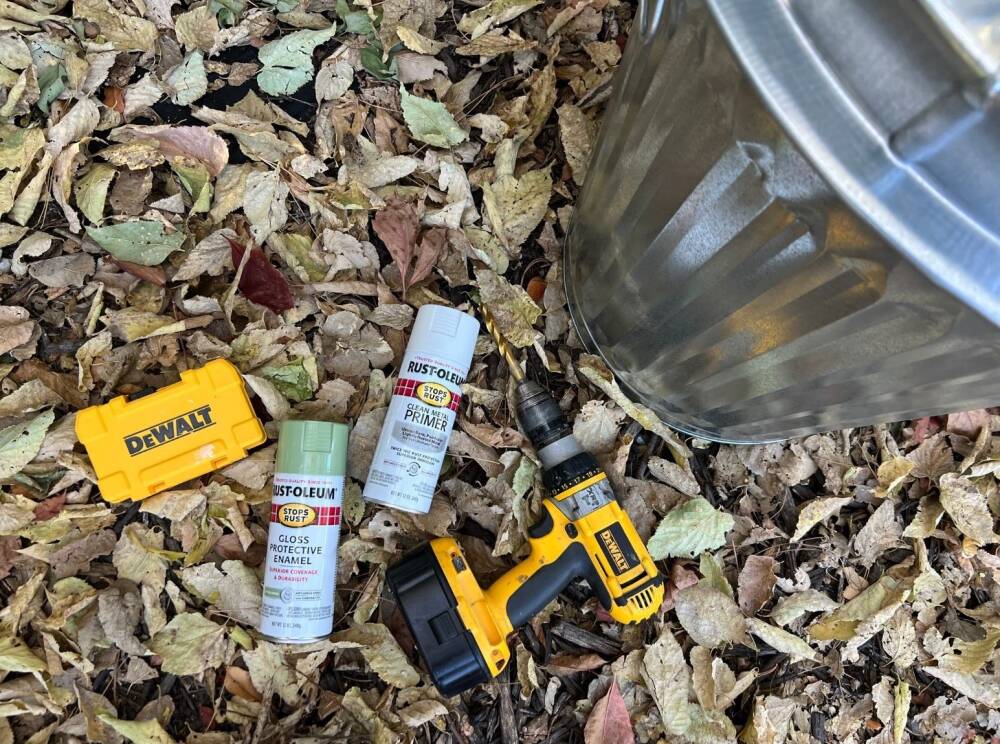
- Drill
- Drill bit
- Spray paint (optional)
- Gloves
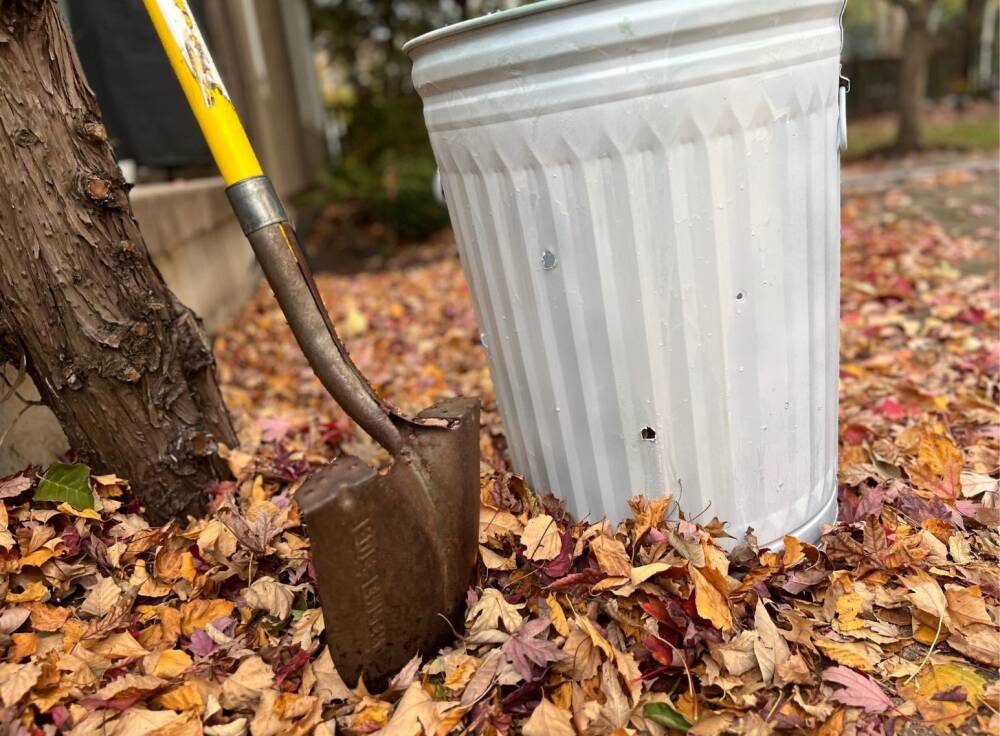
- Long handle garden tool like shovel, hoe, cultivator or garden fork
- Disposable gloves
- Garden hose
- Nozzle spray
Making a trash can compost is a good start for any compost beginner. You won’t need a lot of space and the size of the compost is a bit more manageable. You can use a plastic trash can but we opt for the metal trash can just for appearance.
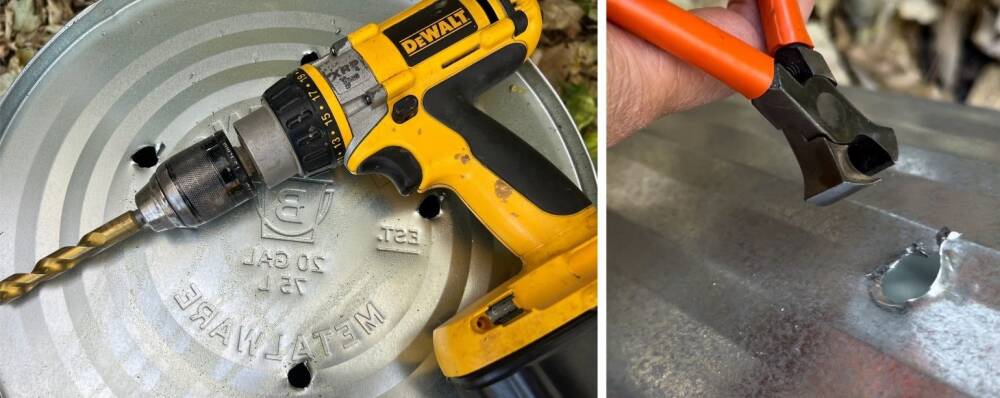
Next, drill about a 1-inch size around the lid for ventilation and drainage. When you drill a metal can, there might be sharp edges. You can snip them off with pliers.
To prevent rust, we sprayed it with a clean white metal primer. Just cause it ‘s for your food waste doesn’t mean it has to look trashy l and be an eye-sore. You can spray paint with your desired color with gloss protective enamel spray too. Sutherlands has several colors to choose from.
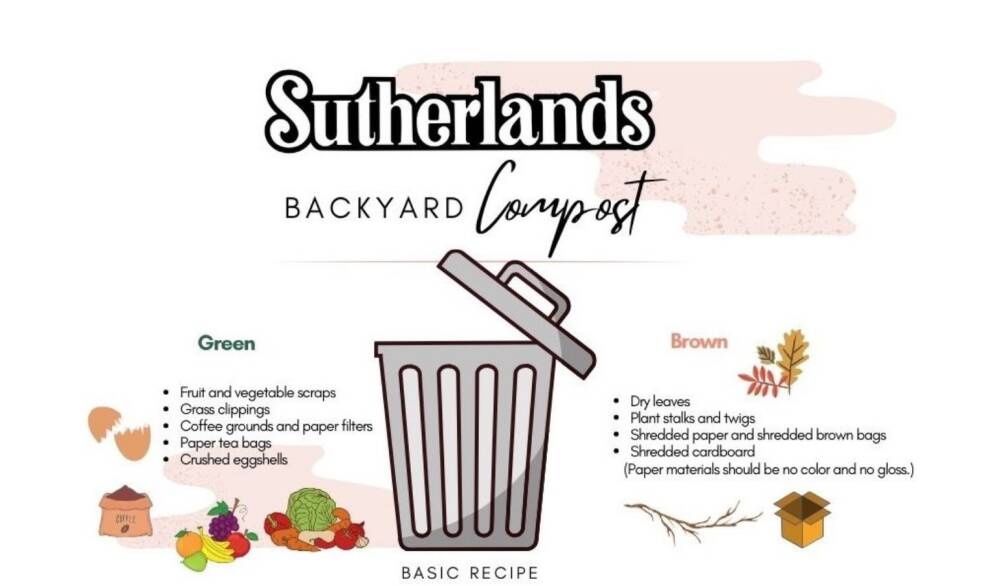
Next, it's time to start cooking! Remember the basic recipe outlined above. Not everything in your kitchen belongs in the compost bin; for instance, avoid adding bones and meat, as these can attract unwanted critters. A few things to avoid are diseased plants, glossy paper, anything that might have chemicals that will harm your plants.
There’s no bad time to begin this project, but fall is especially ideal for utilizing yard clippings, branches and falling leaves. This will help the scraps decompose and prepare them for spring planting.
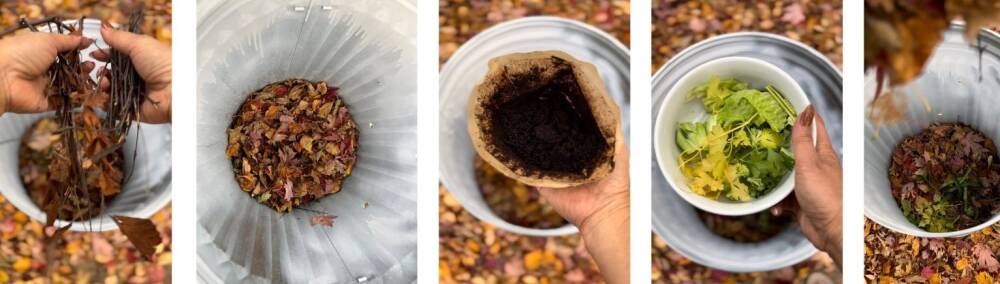
Start by using less dense scraps like branches and twigs to promote air circulation. Then start with brown materials that will create more carbon to the pile. Then get out those kitchen green scraps for the next layer to promote nitrogen rich materials. Lightly water between the next layers to add moisture. Don’t forget to use those grass clippings; they’ll prevent the compost from becoming compacted.
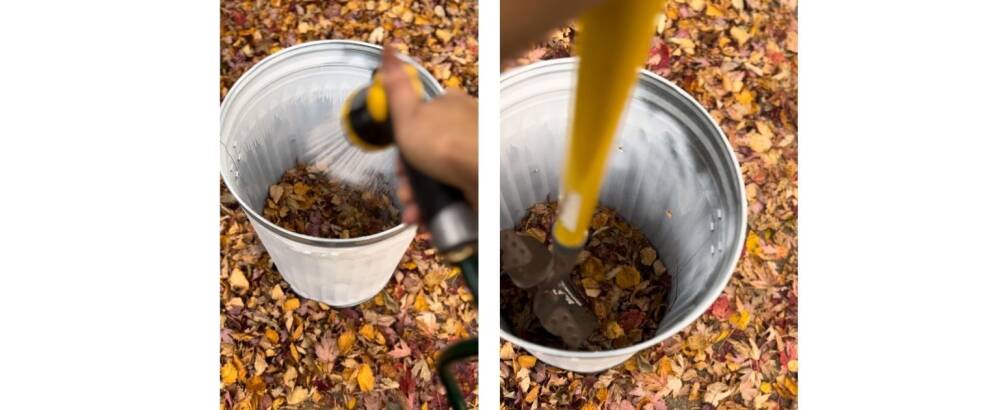
A new term you will learn to embrace is “turning” compost. You will want to turn it every 3 to 4 days at the initial stage. Turning is crucial to allow oxygen to speed up the decomposition process. As you add more to the bin, you should always add water and keep turning the compost. As it starts to decompose, you can turn it less often. Ensure that the materials are mixed thoroughly, distributing moisture and oxygen evenly throughout. This practice helps to prevent odor, accelerates the breakdown of materials and ensures that your compost is rich and ready to use in your garden. Using a pitchfork is ideal to break the compost up. Don’t be alarmed if you see a white substance (a bacteria called Actinomycetes), that is a good sign your compost is working, heading to becoming a nutritious source for your future plants.
It is ideal to leave the bin right on the dirt. Earth worm can help with the decomposting process.
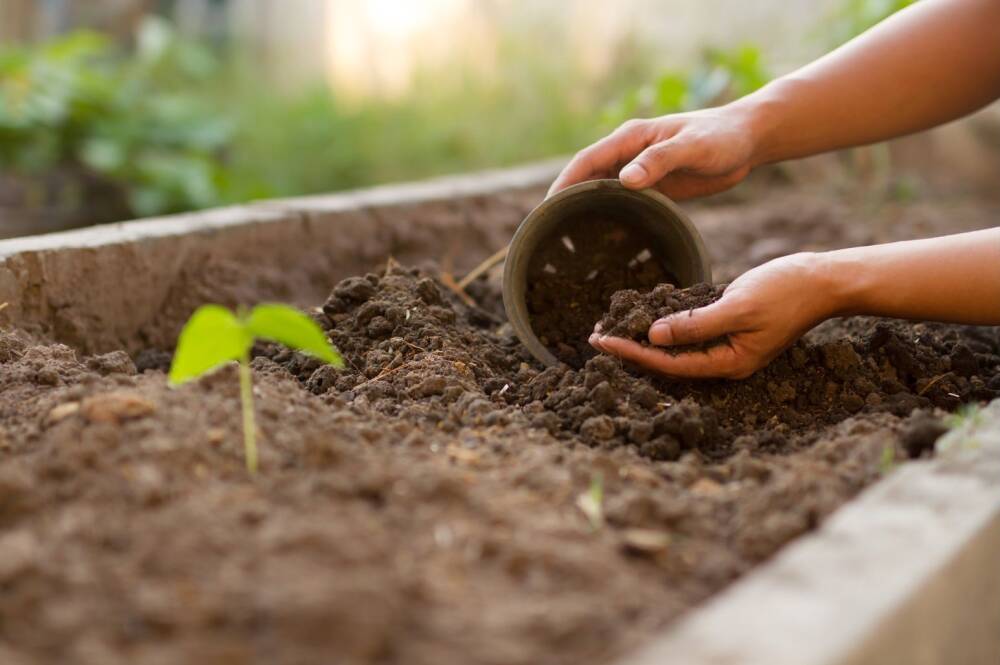
If you achieve success by spring, you will be well-prepared for the growing season ahead. Your garden and the environment will certainly appreciate your efforts.