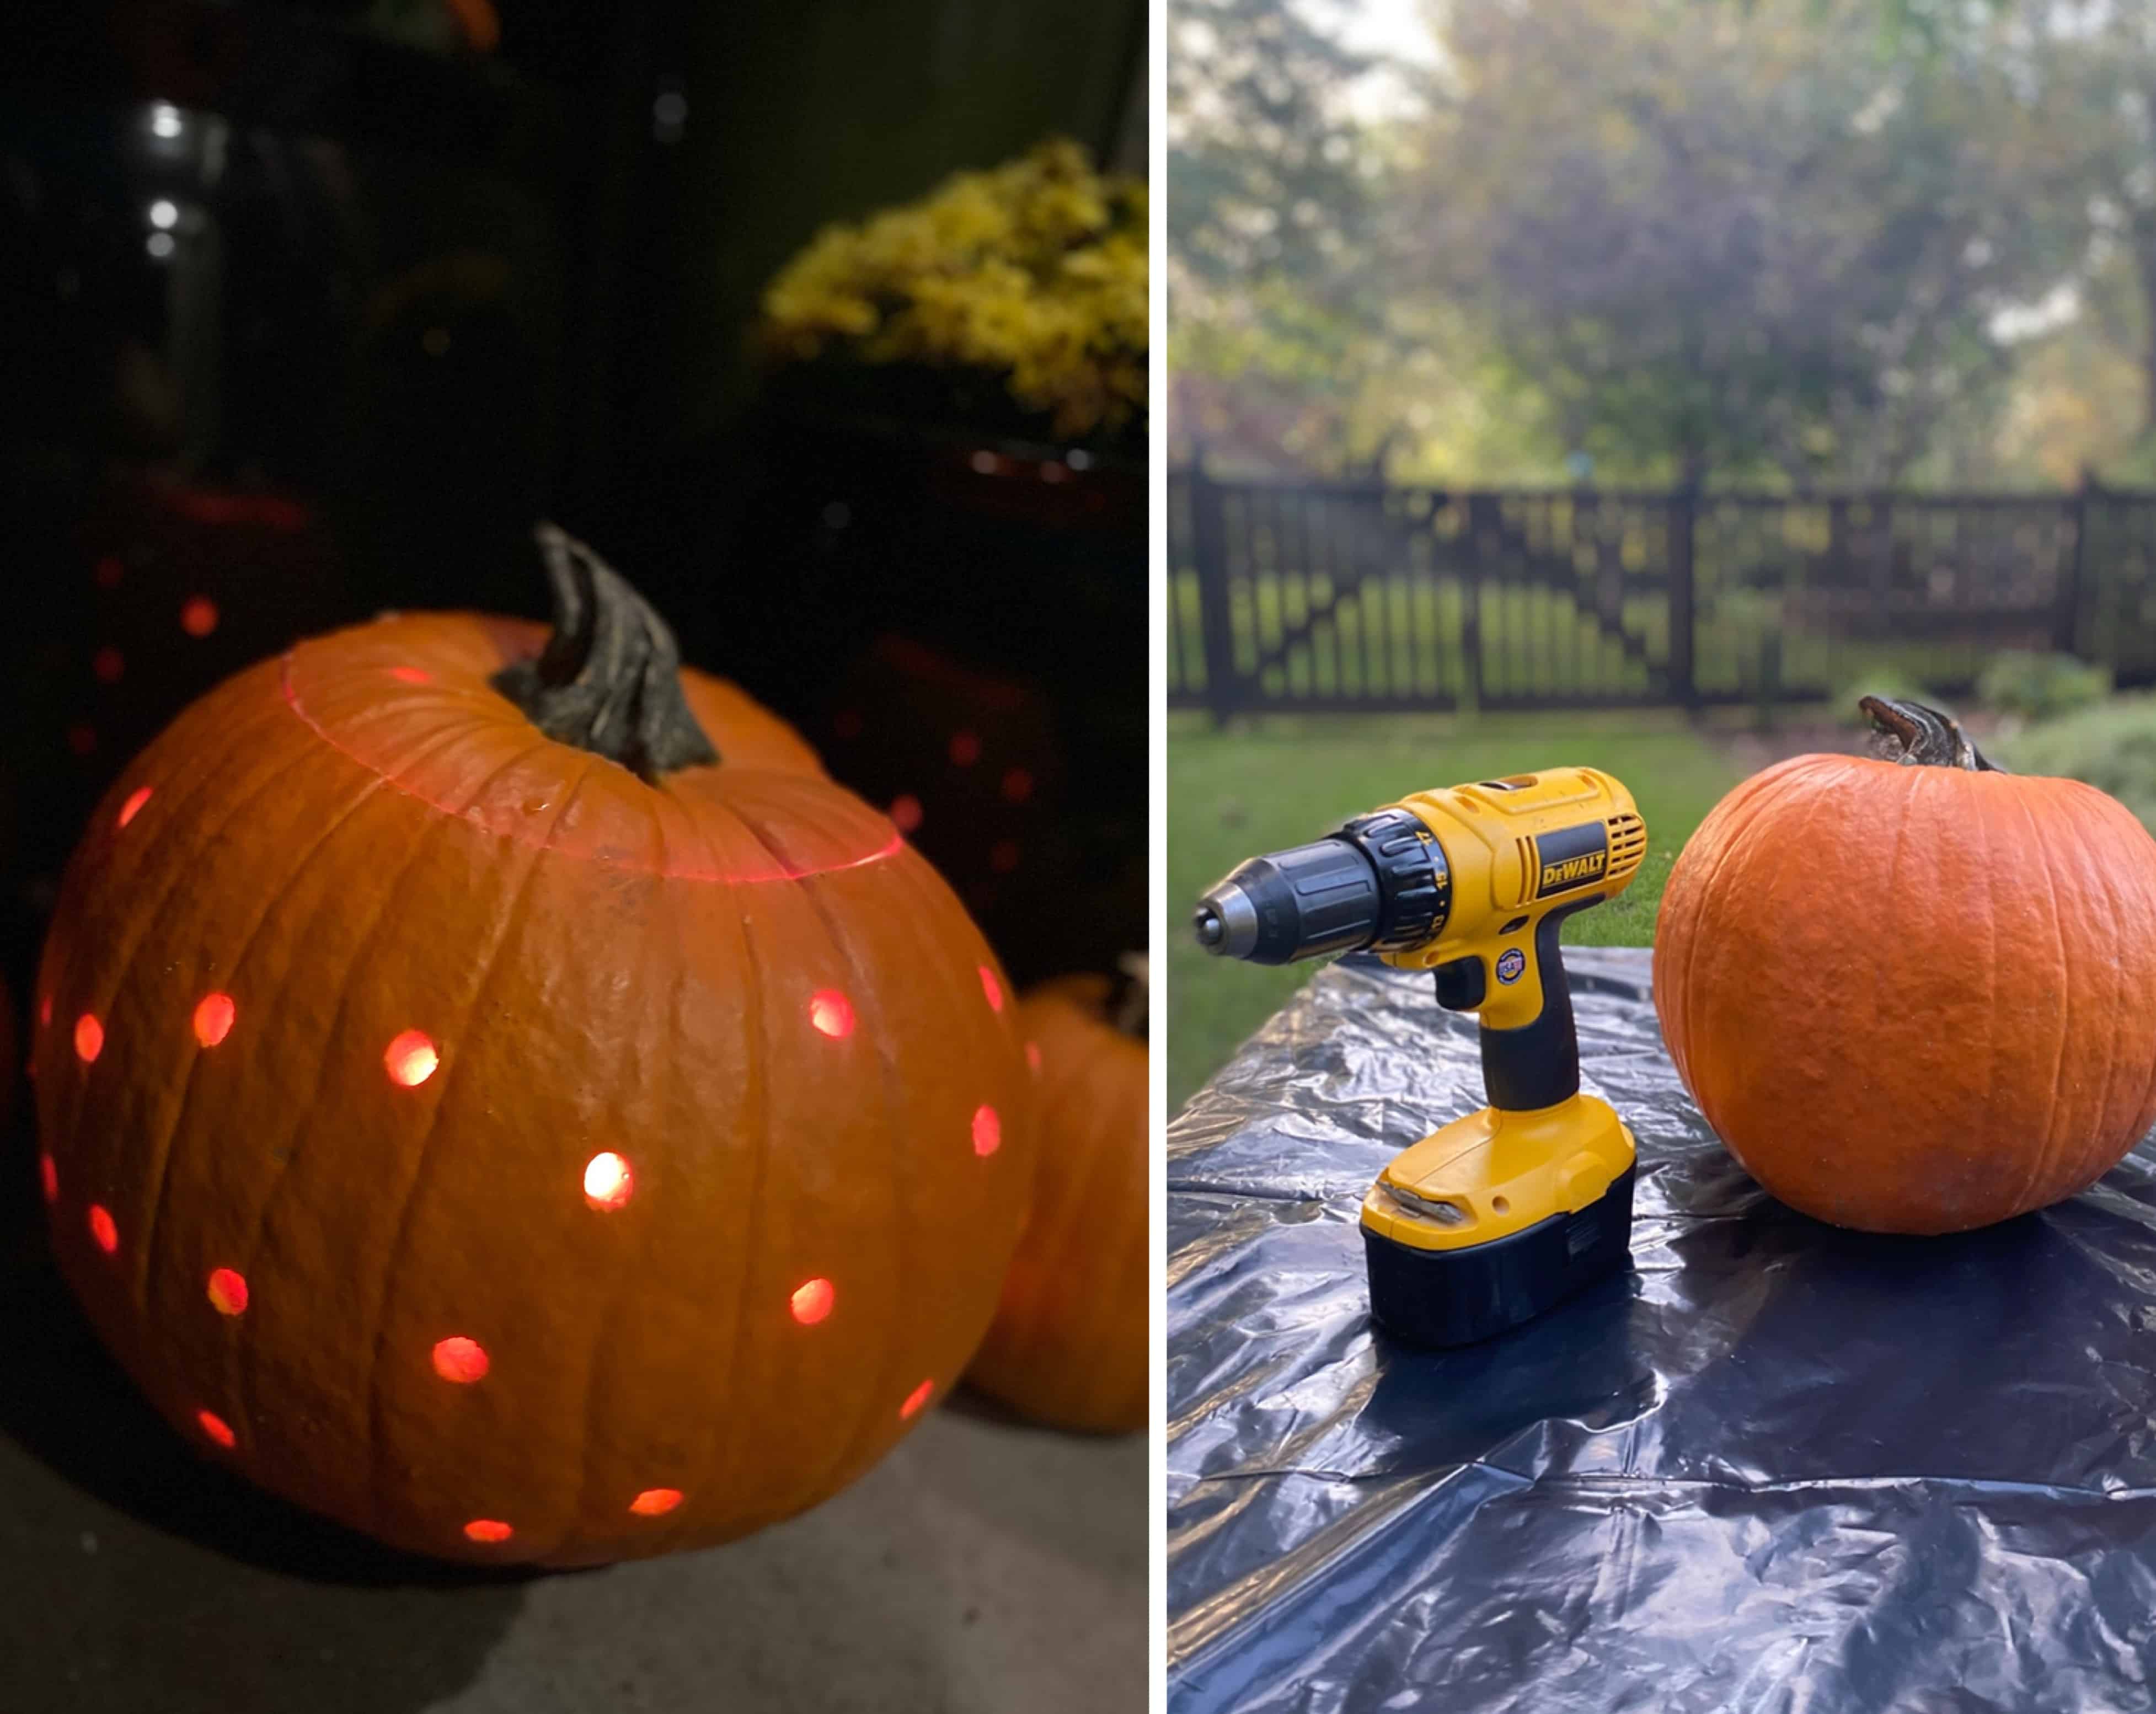
We are taking pumpkin carving to the next level! Use your power drill for quick and easy pumpkin carving.
For this project you will need:
1- Good size pumpkin
1- A drill (we used an 18-volt drill)
1- Assorted drill bit set
1- Cake mixer attachment
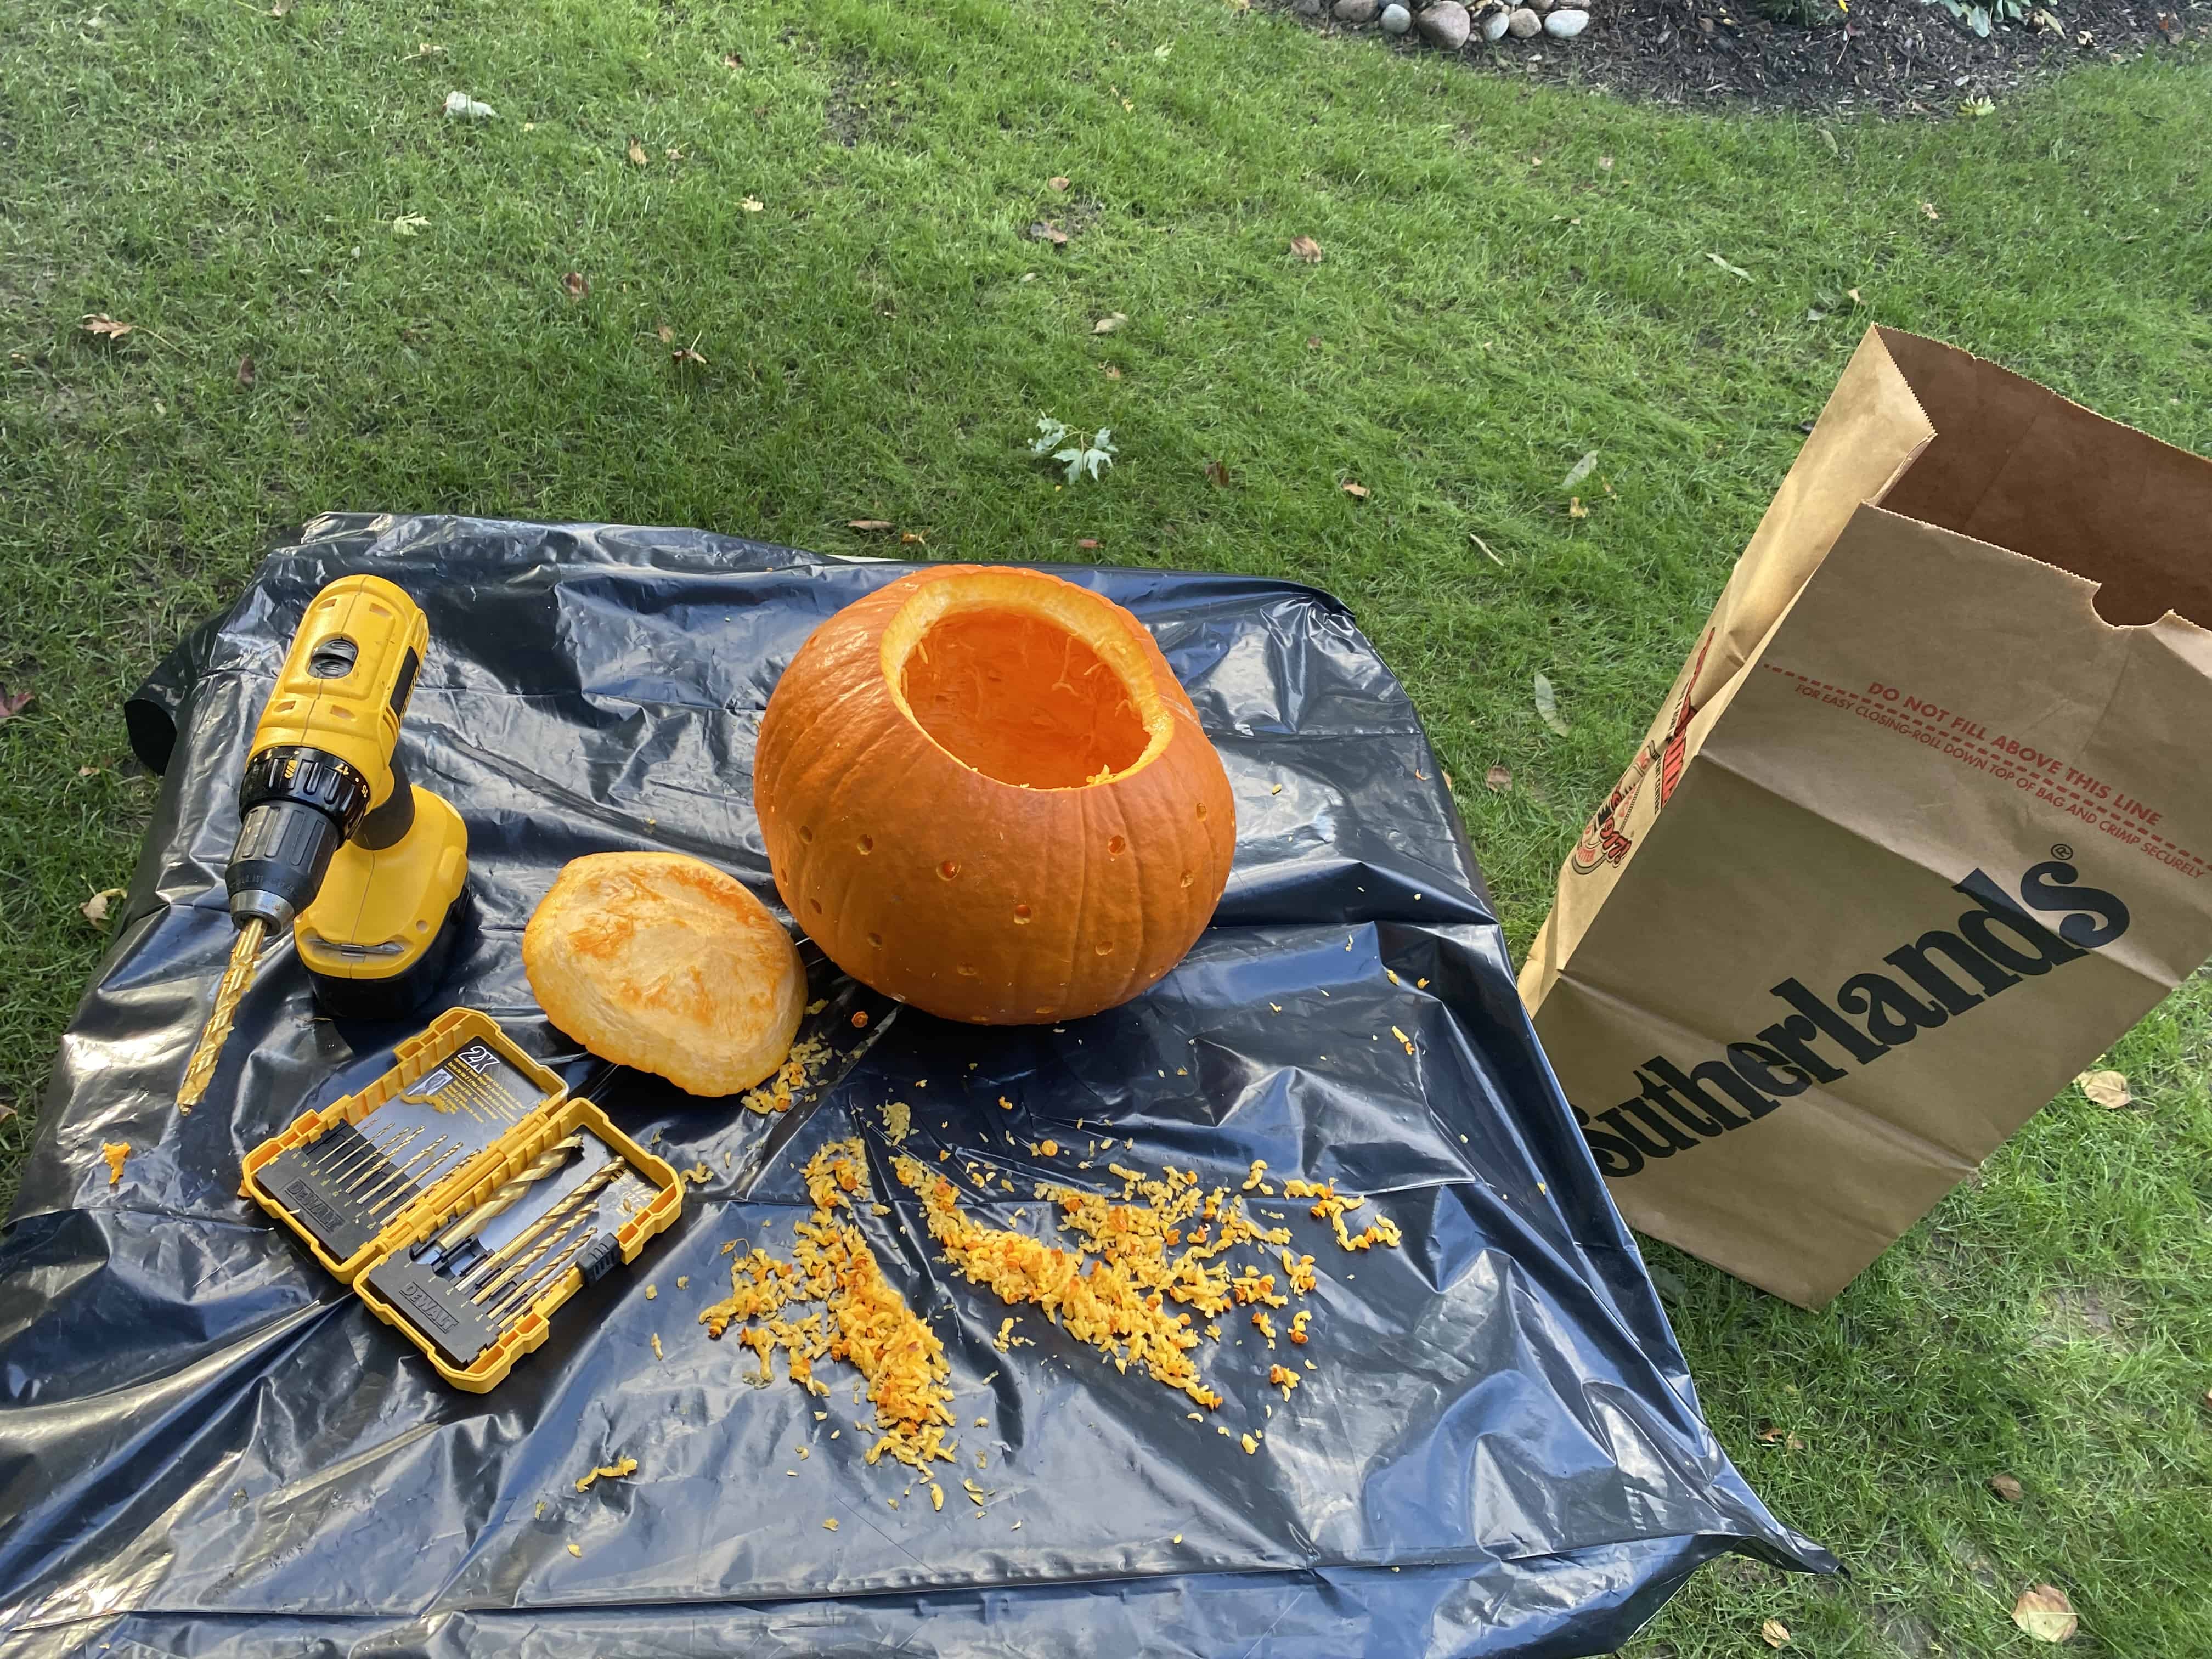
1- A plastic trash bag
1- A Sutherlands lawn bag
1- String light or candle
Before you get to the fun part of pumpkin carving, painting or decorating, you will have to get through the gruelling first step of gutting and cleaning out the pumpkin.
We might just have found an easier and less messy way to get the job done with this unlikely combo, a drill and a cake mixer!
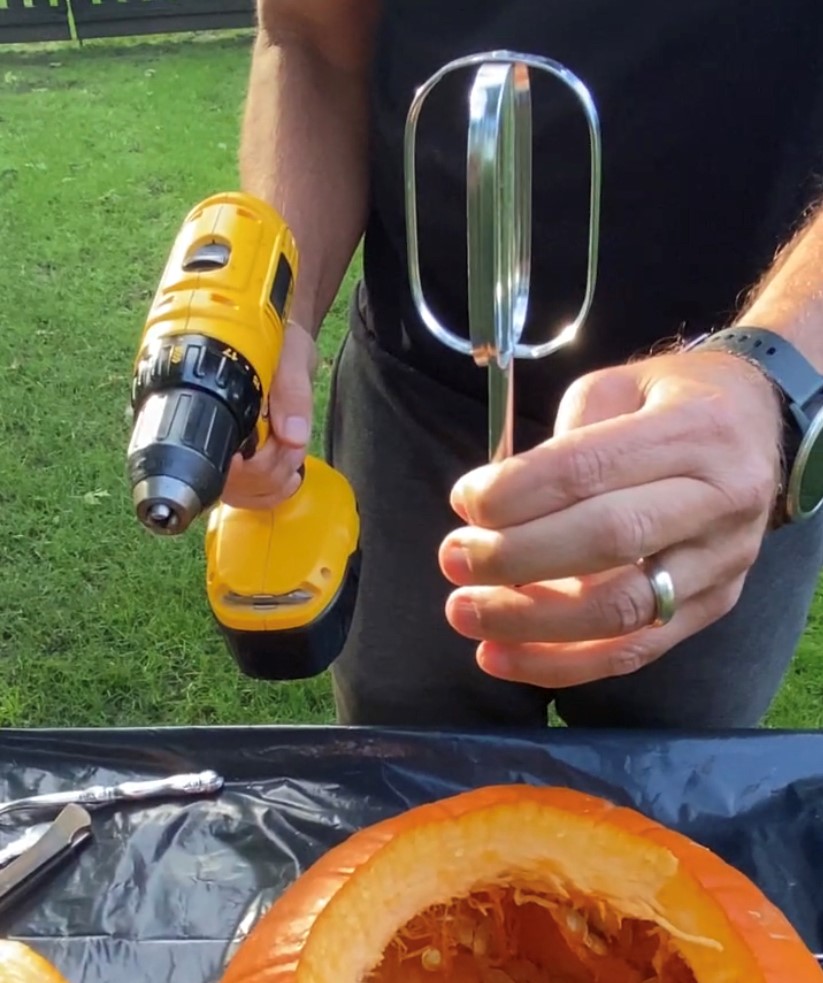
First thing we learned was not all mixer heads will do the job. You need a more sturdy one (shown) to really scrape the inside surface.
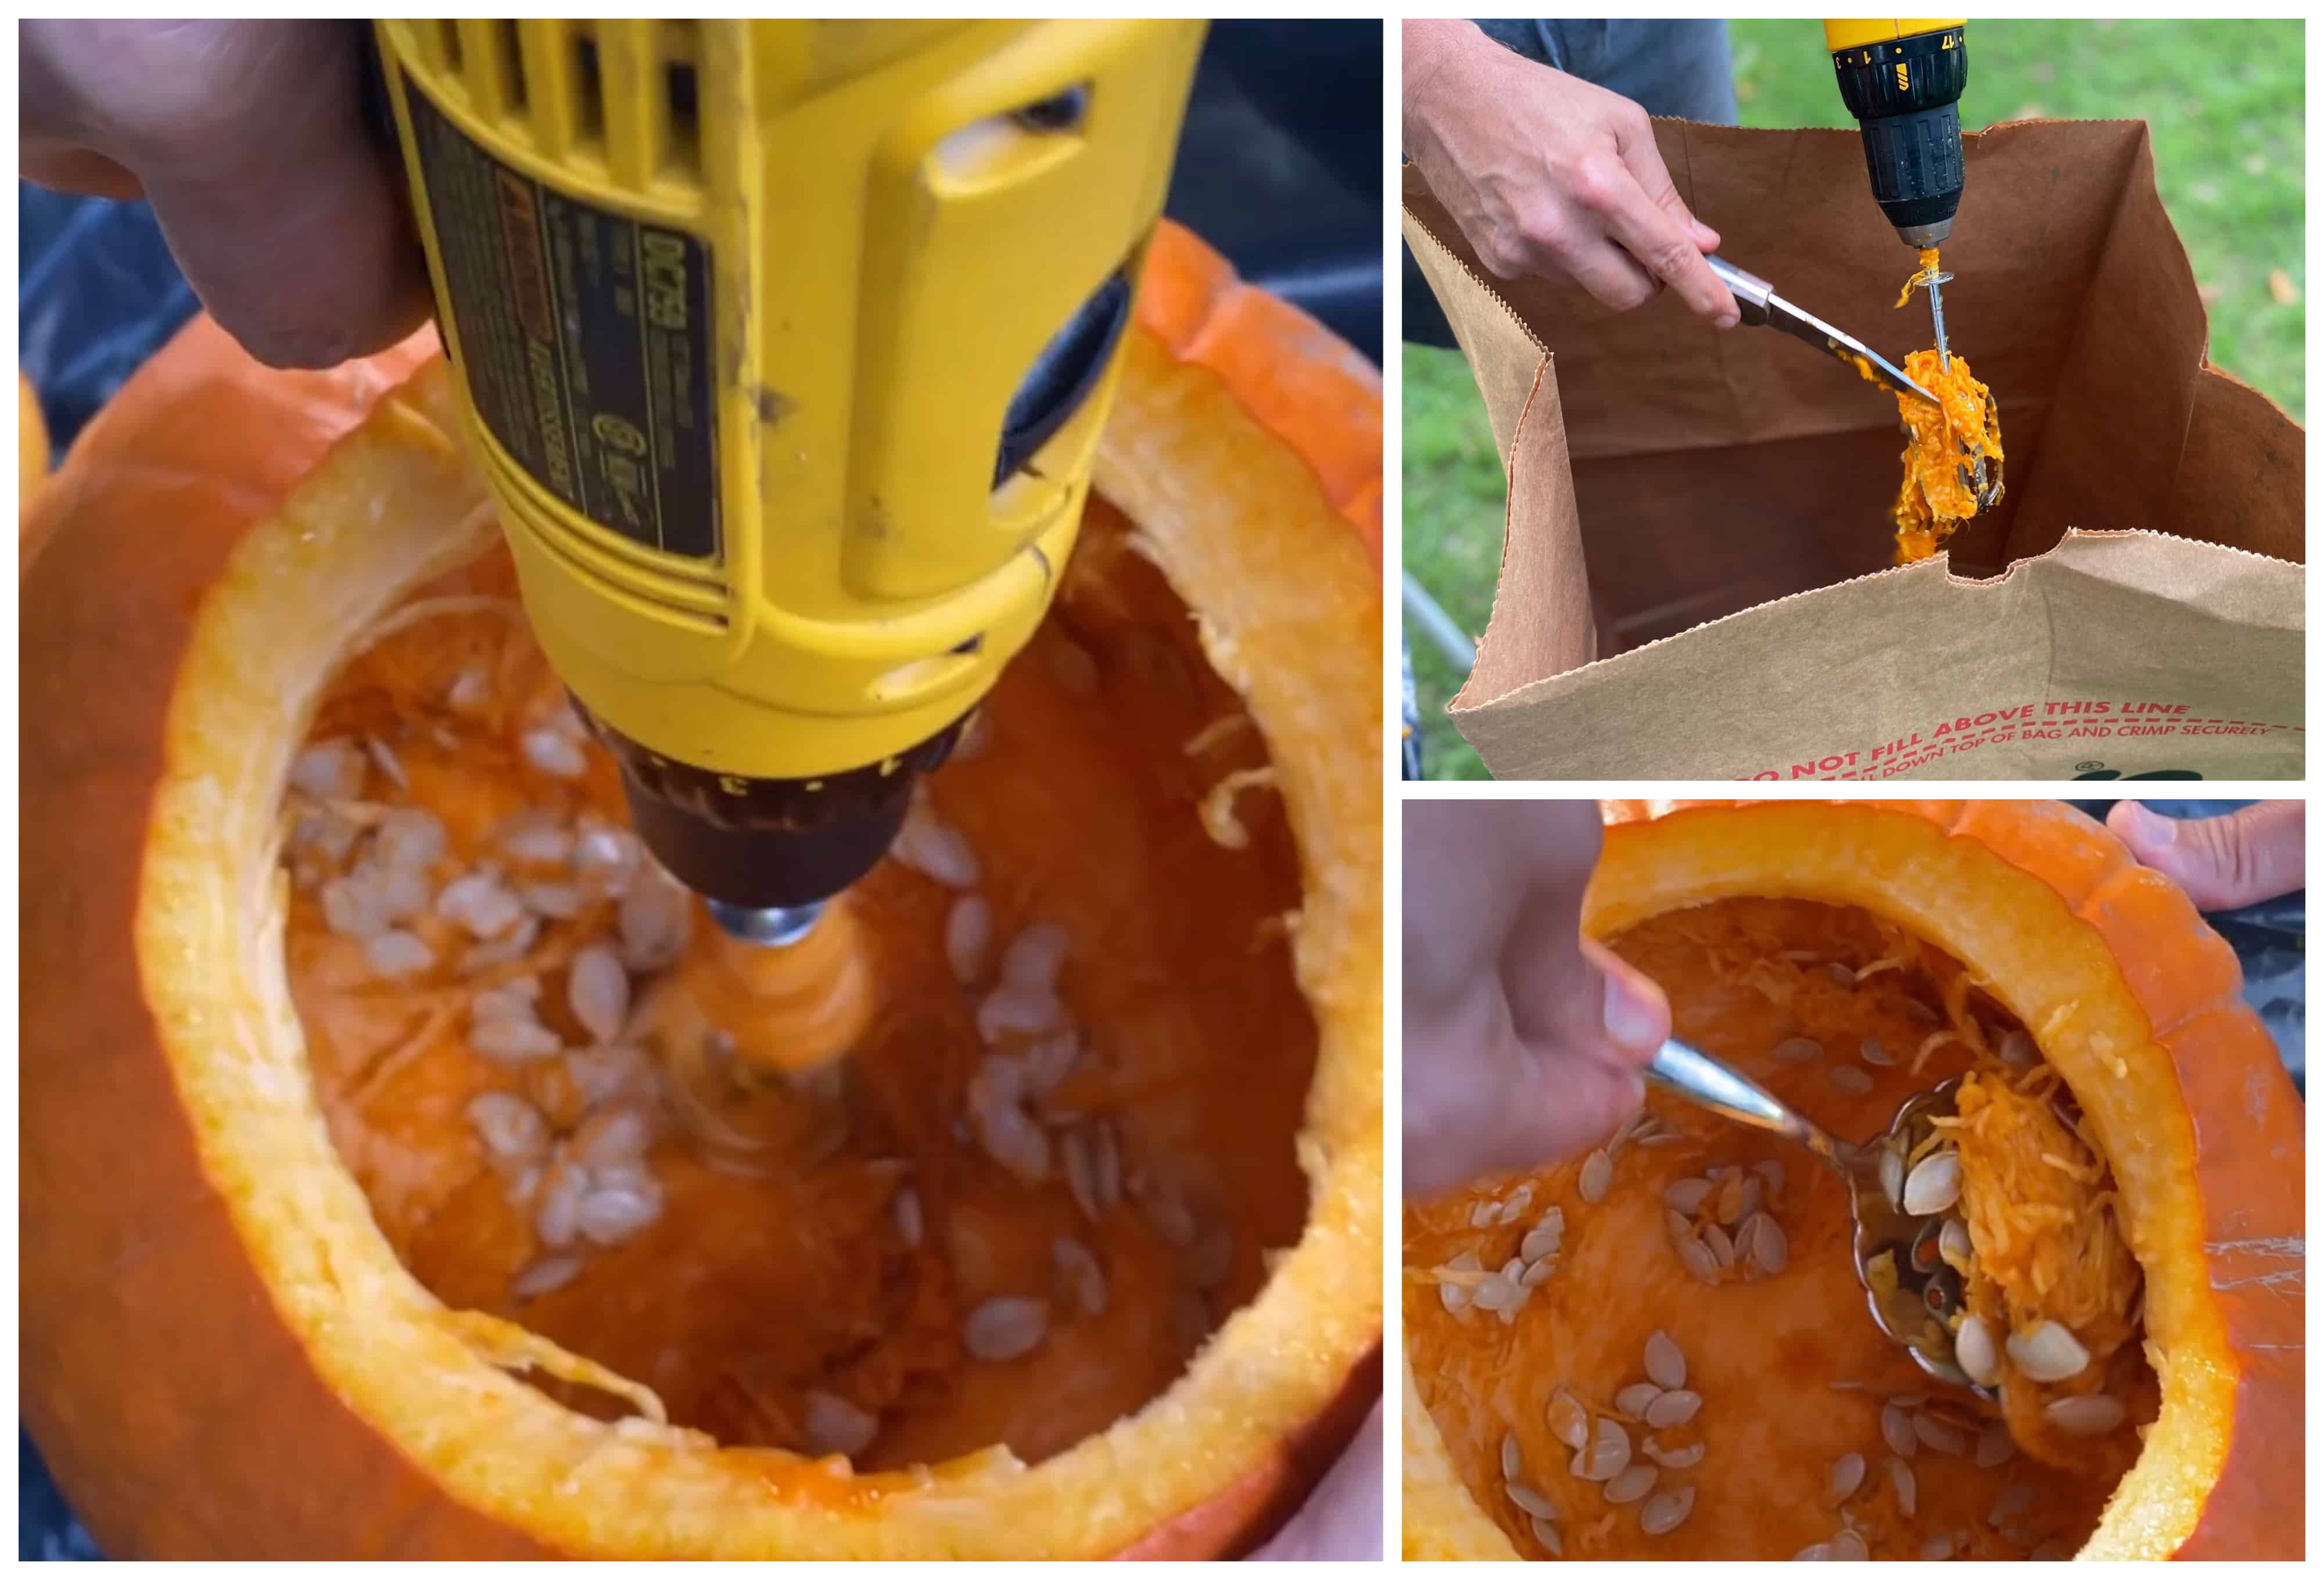
Lay out your table or surface with a plastic bag. Next, simply attach the mixer head onto the drill as you do any drill bit attachment. Give it a good spin until you remove all the pulps off the inside of the pumpkin. Use your hand or a spoon to remove the pulps and seeds.
Let's continue the fun with using a drill bit to create this polka dot design. We used 3/8" drill bit for larger holes but you can mix it up with different sizes all over as well. If you will be using a candle, be sure to drill the cap of the pumpkin for ventilation. It might help to mark where you want the design to be. Next just drill away!
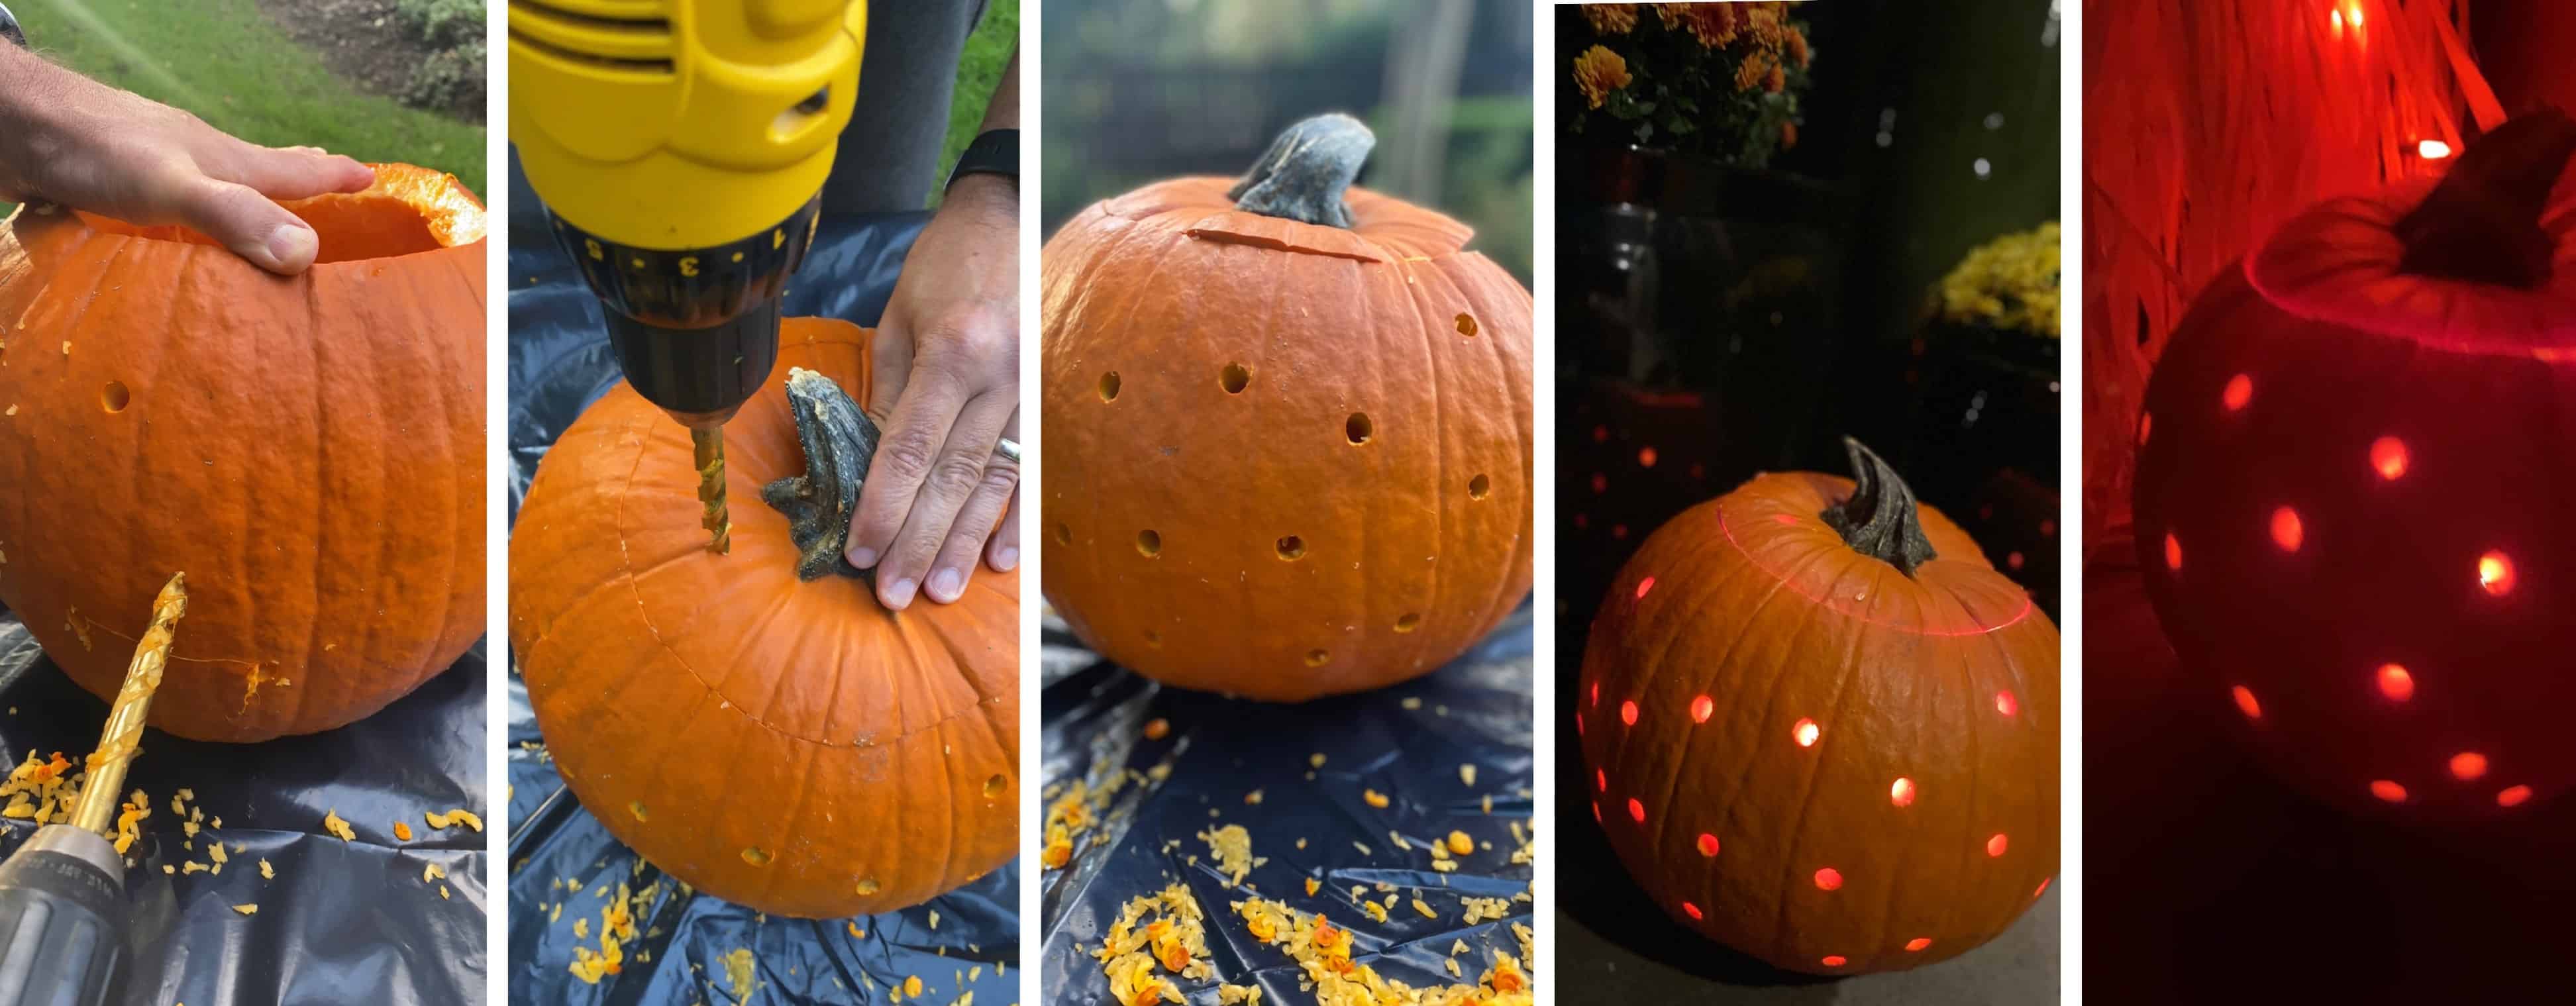
Ilumination is your last step. You can use a string light or a candle.
This whole process took less time and definitely less mess to clean up. Don't forget to grab some lawn bags for this project! Be sure to share your project on our social media Facebook, Instagram, Twitter! We can't wait to see what you come up with!