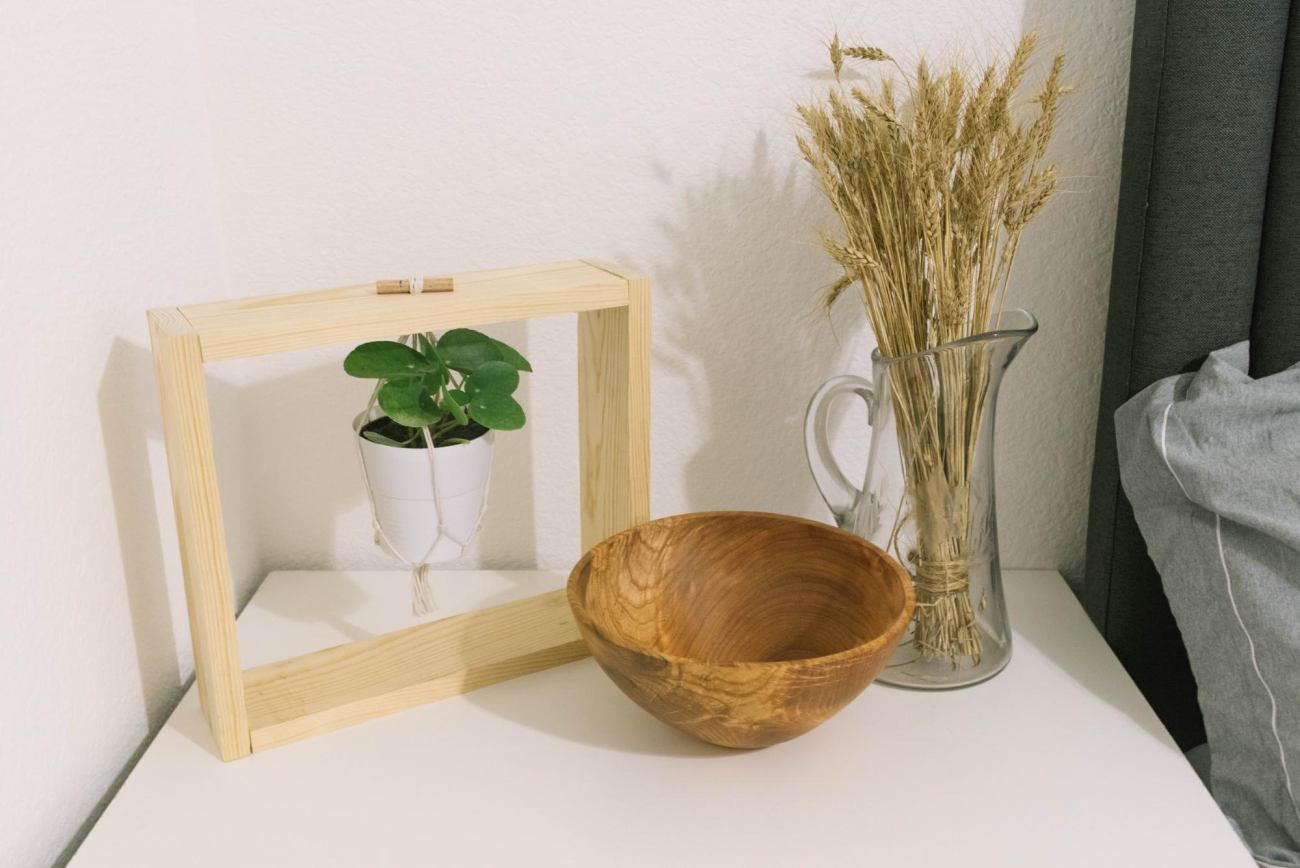
It’s getting closer to spring time, despite the random evenings of snow. So, I decided to get myself in order and start decorating for the season. I always want more pops of green in my home, so I am constantly getting new baby plants to liven up the space. I wanted a unique way of showing my small plants though, so I made a little hanging planter.
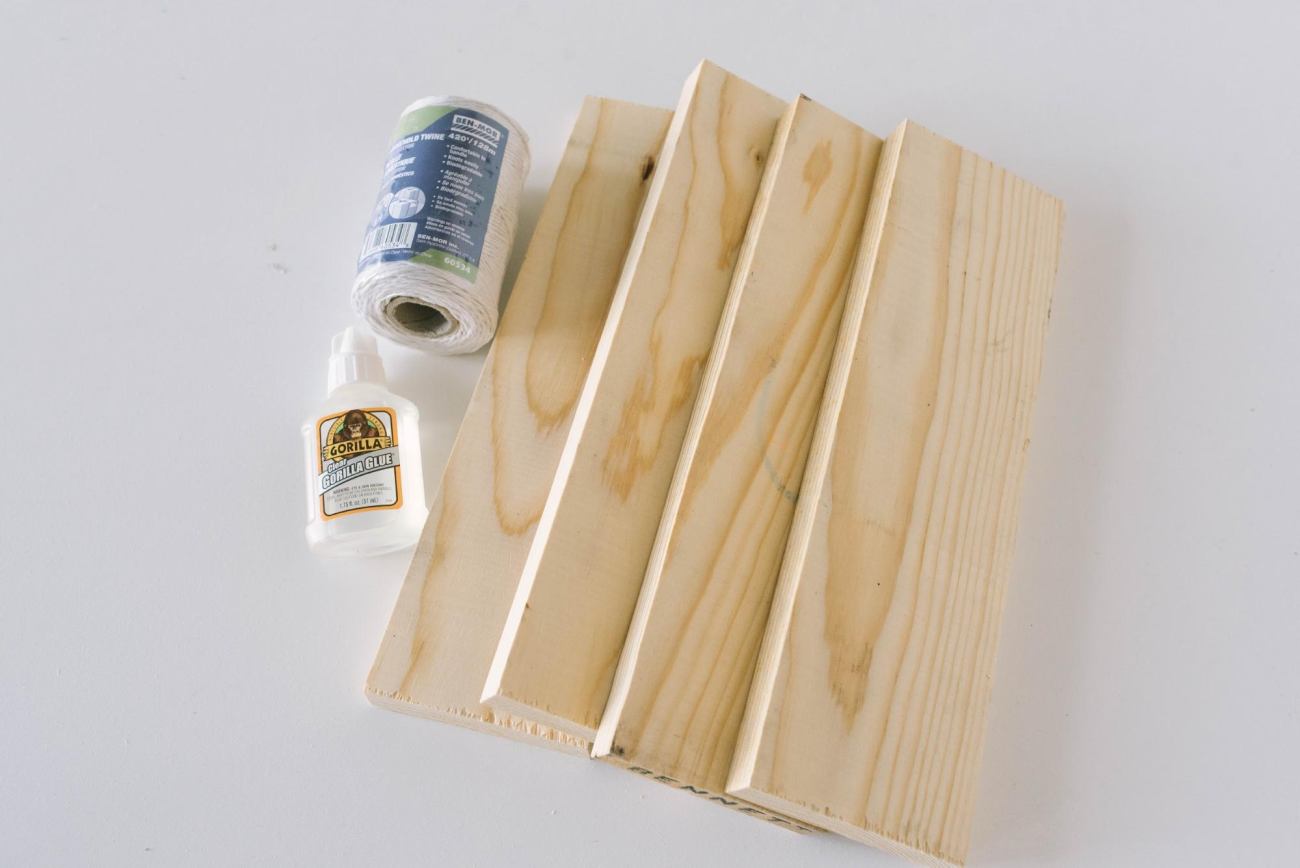
The equipment needed for this project is listed below.
- (4) 12x1x4’s
- Clear Gorilla Glue
- Wood screws
- A dowel rod cut to 2 inches
- Household twine
- Scissors
- Drill
- Small plant
I decided not to stain mine, but that is always an option for those that want different colors.
I started by lining up my boards. I just wanted to see how they fit together before I started applying glue. I applied glue to the boards and clamped them to make sure I got a tight fit. After the glue dried, I decided to add one screw to each corner for more support.


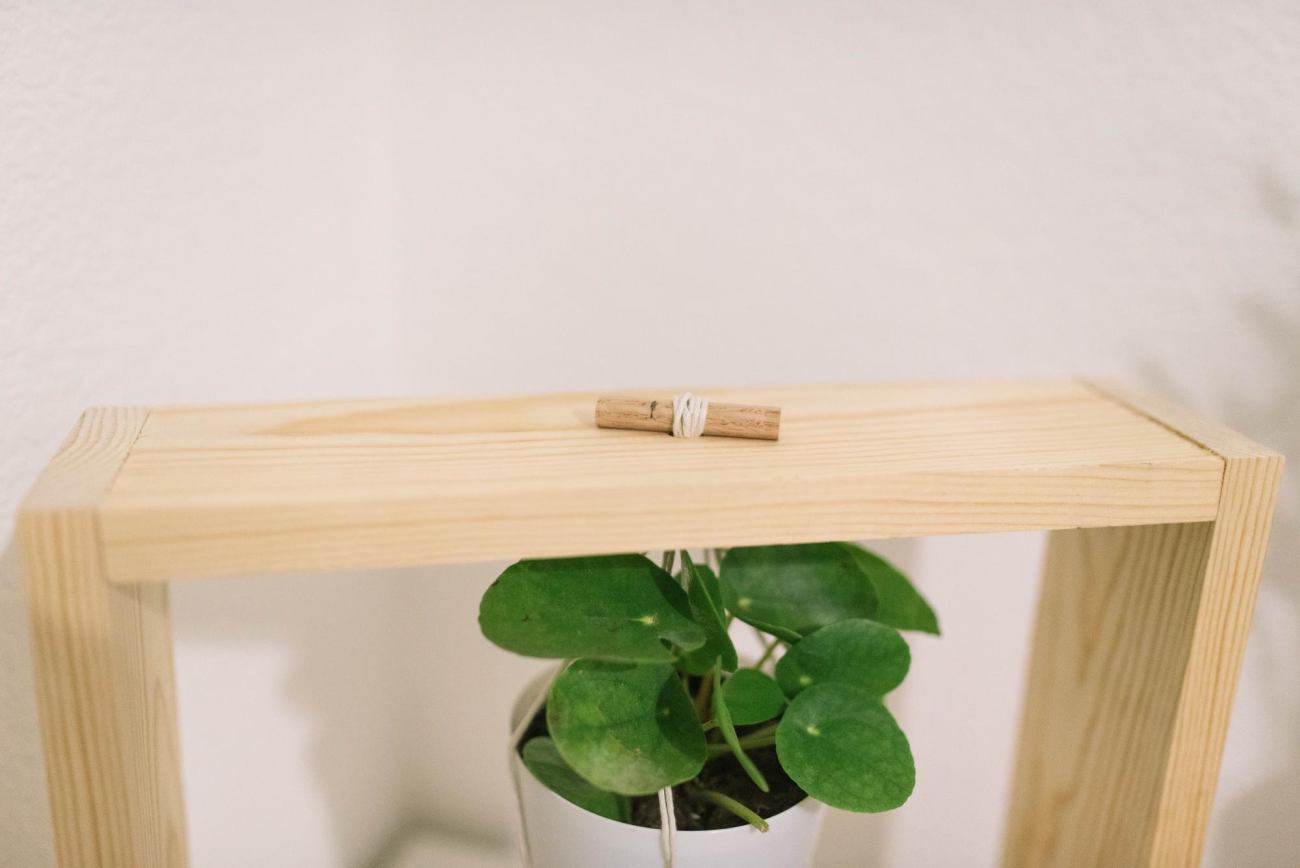
Once the entire frame is built, drill a hole in the center of the top board. This will be where you hang the plant. Honestly, the next part was the most complicated for me. I am not skilled in any sort of macrame. I started by cutting six long strings and folding them in half so I have a loop. Pull the loop through the hole at the top of the frame and slide it around the dowel rod.
Then, section the strings into twos and tie knots in each pair. Then at the very bottom tie one large knot to keep the plant from sliding through. This took me two tries to get right, but don’t get discouraged if it doesn’t work the first time. It might take some adjusting.

Then once the plant is placed, give it some water and you have a new little bohemian decoration for your home! For those that are curious, this little plant is a pilea peperomioides (aka Chinese money plant) and it is easy to care for if you are looking for a cute indoor plant.