Okay, I love my dog as much as the next person. However, he still has his kennel because he loves to nap in the little alcove where I have placed it. The kennel sort of clashes with my decor so I decided to try to dress it up a little. I have seen these sort of kennel-side tables before in my ads, but generally they are incredibly expensive. So I rolled up my sleeves and got out my handy measuring tape and got to work.
First off, my dog is a pit bull/dachshund mix. So he is hefty but short, so I got him a 36” kennel. It suits him perfectly because it is cozy but he has enough room to turn around inside. The exact measurements I use are for a 36” but can be adapted for larger or smaller kennels. I made sure to leave a little space between the kennel and the wood so I can take the kennel apart if needed. (Also why I left the top of the table removeable)
For the lid I used melamine so it would have a smooth surface. Here are the measurements below:
- One 42x29x1 inch melamine board
- Four 38x 2 ½ x ¾ inch pieces of wood for the long crossbars (C)
- Four 26x 2 ½ x ¾ inch pieces for the short crossbars (D)
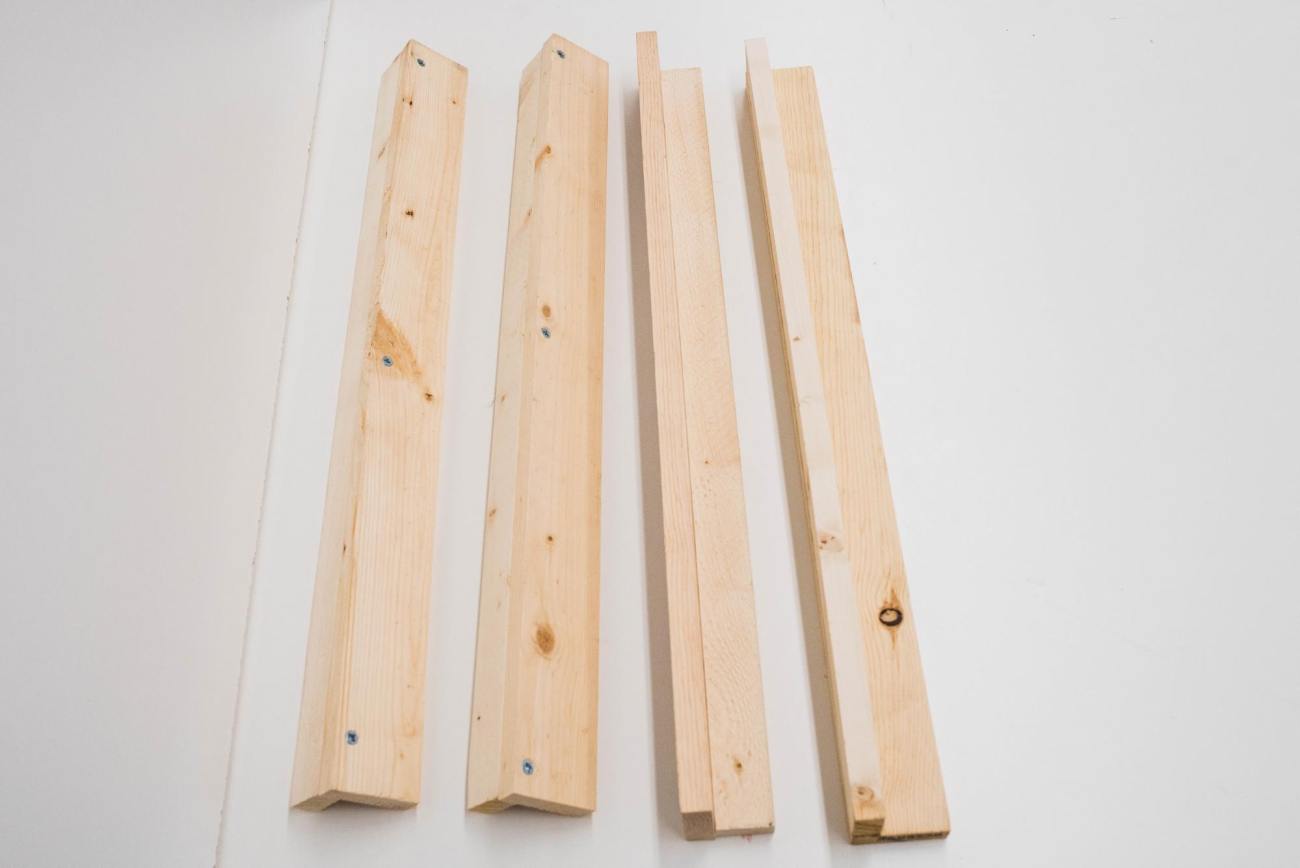
- Four 28 x 2 ½ x ¾ inch pieces for the corner posts (A)
- Four 28 x 1 ½ x ¾ inch pieces for the corner posts. (B)
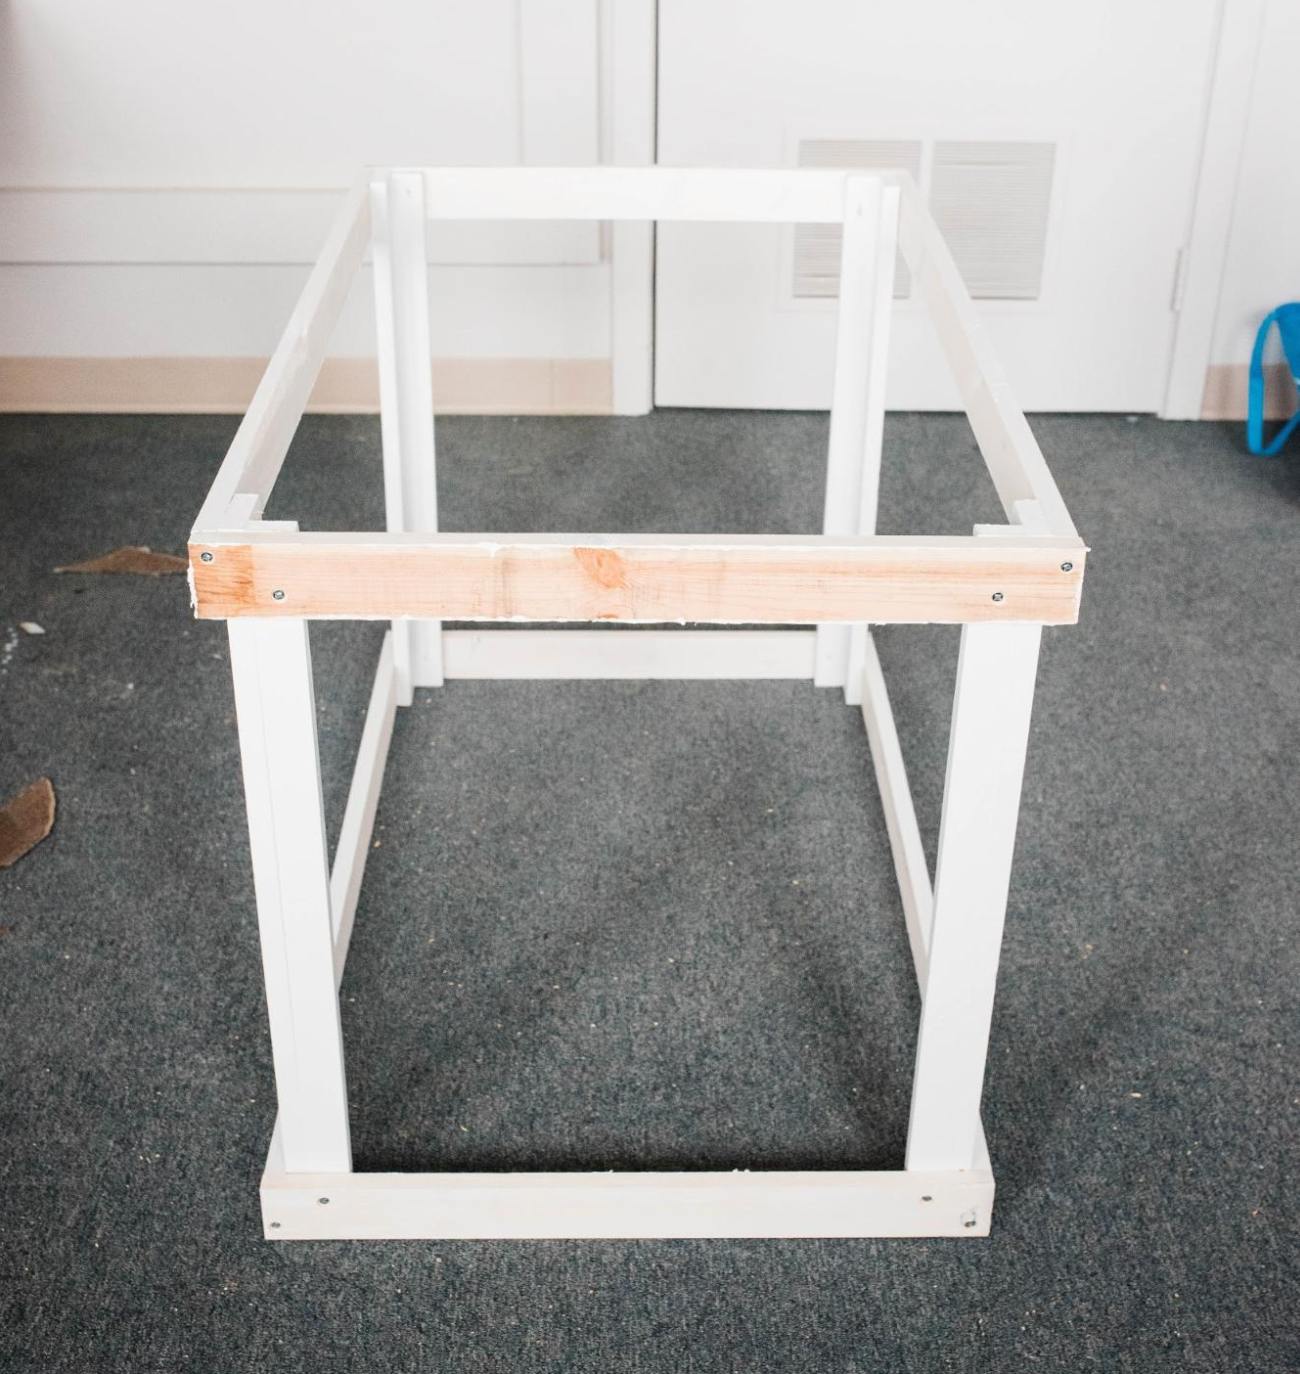
I first started by sanding every piece of wood. I wanted the pieces to be as smooth as possible so I started with medium grit and finished with a fine grit paper. I started by making all of the corner pieces. I did this by screwing together the A and B pieces in a right angle.
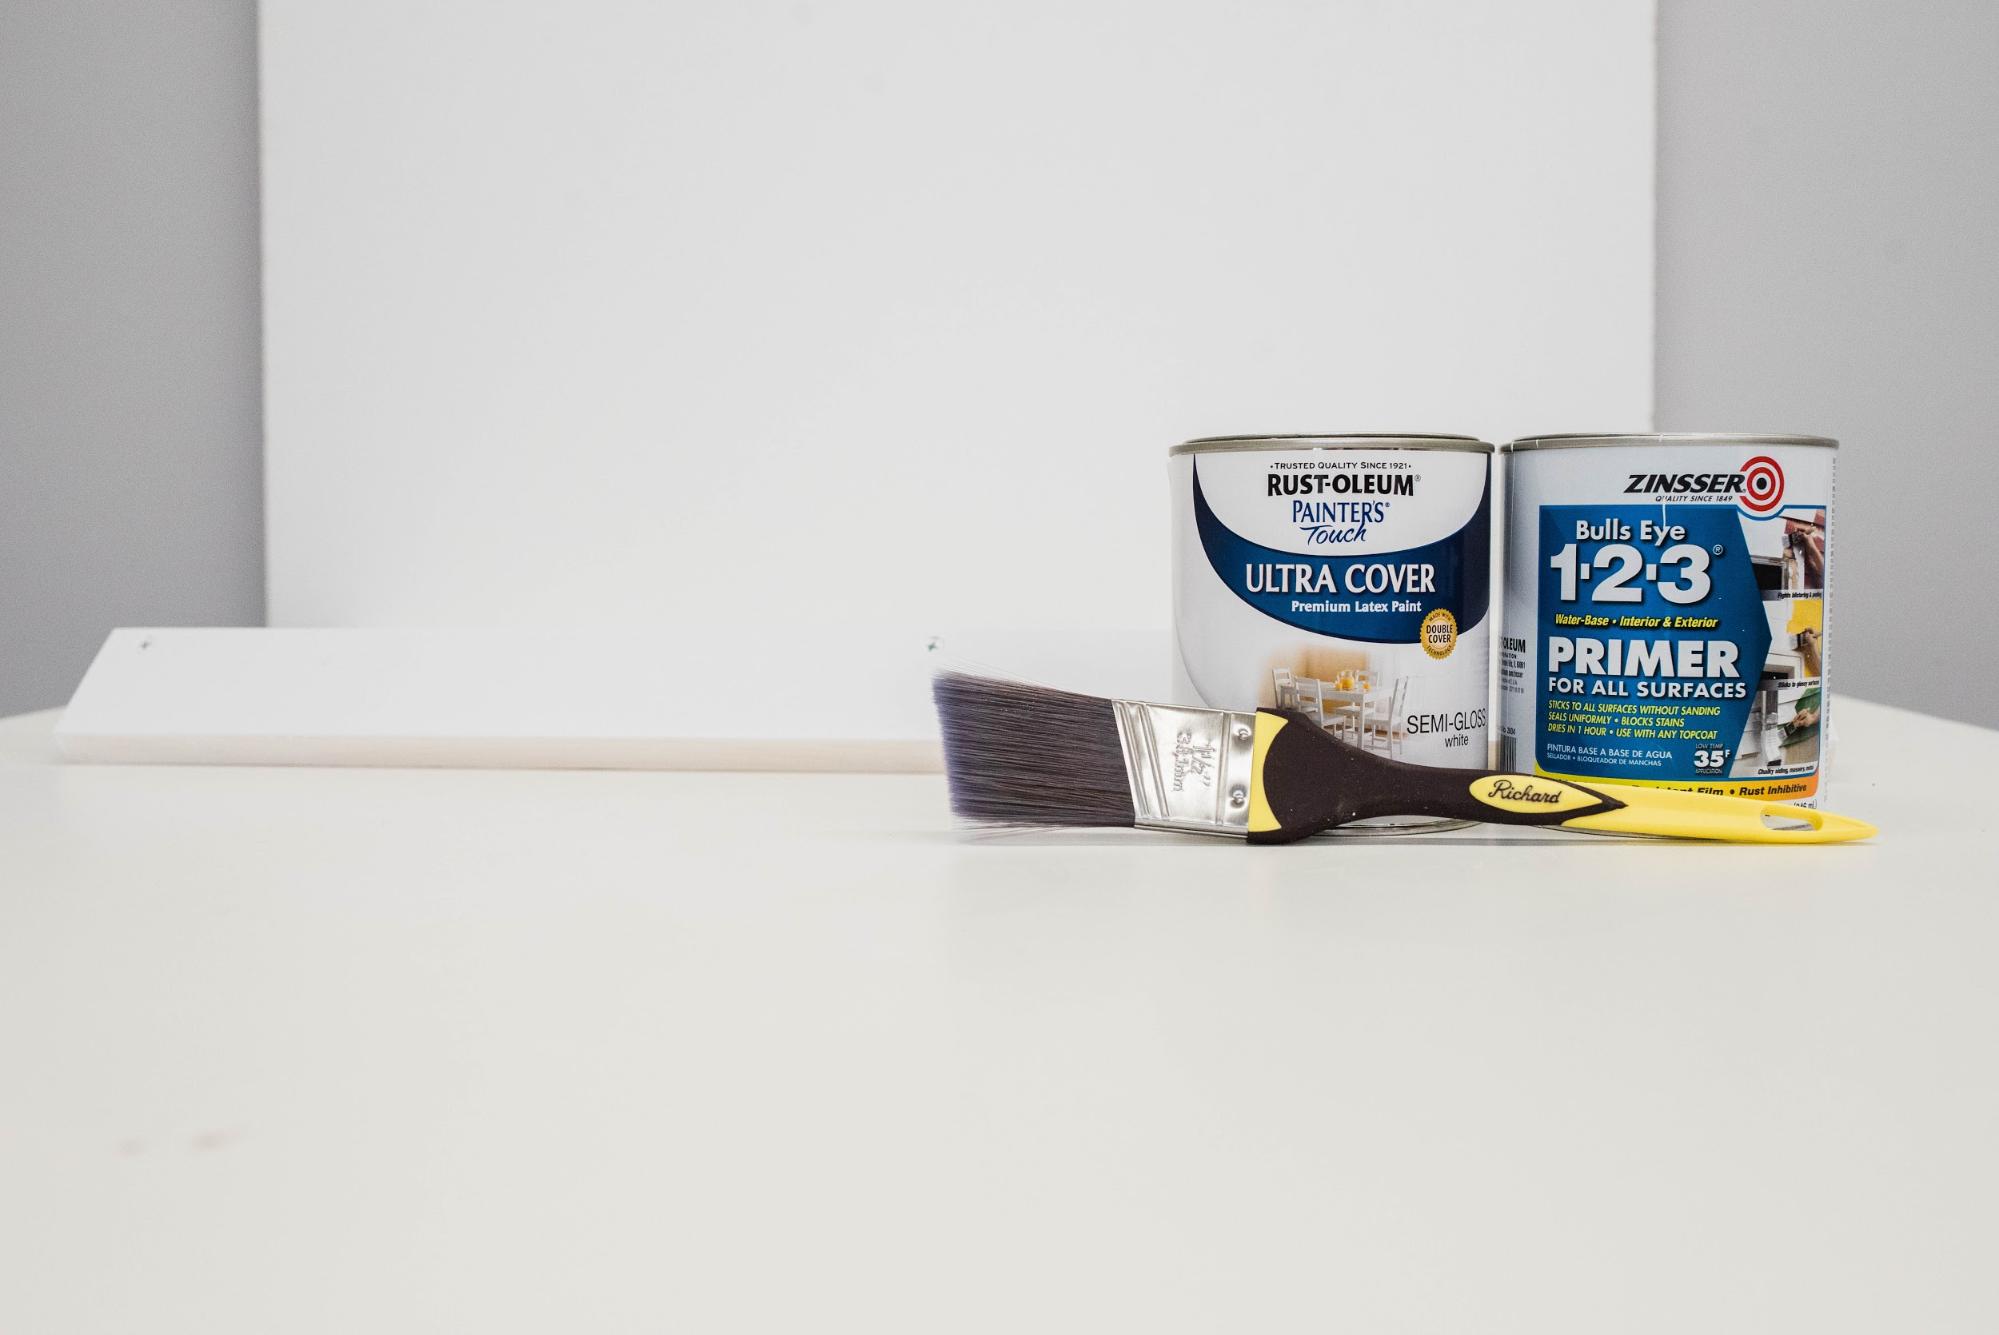
Then I primed and painted these corner posts so I could get an even coat on them before attaching the other pieces to them. I used Zinsser primer and Rustoleum Ultra Cover. This can be changed for your preference, but I really wanted that clean, smooth look.
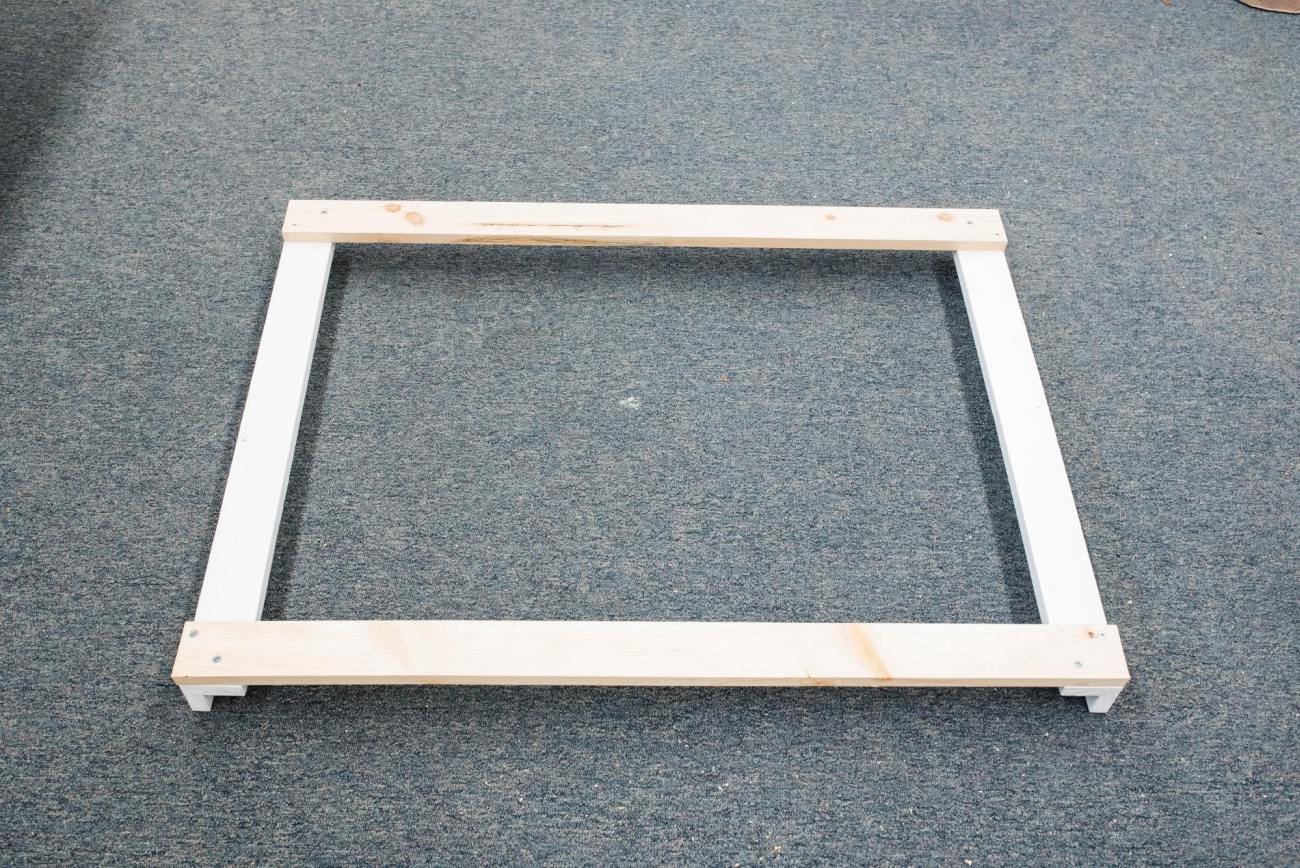
Once the corners were dry, I started attaching the long crossbars ( C ) to the larger width corner pieces (A) . I used a countersink bit with every screw just to make sure the screws would lie flush into the wood surface. This will help make the entire project look more polished and professional.
Once I had attached all four pieces to the corner posts, I primed and painted these pieces. I decided priming and painting as I constructed was easiest for me so I wouldn’t get messy paint jobs on the other pieces. However, this is down to personal preference.
After those pieces dried, I started attaching the short crossbar pieces (D). It is incredibly important to make sure everything fits flush against the other pieces or there will be gapping and bends.
Once these pieces were attached, I primed and painted and then sealed everything with a polycrlic. The melamine had already been cut for me, but it still had those raw edges that I needed to deal with. I simply used an iron-on melamine tape to trim out the edge of the table top to give it a more finished look.
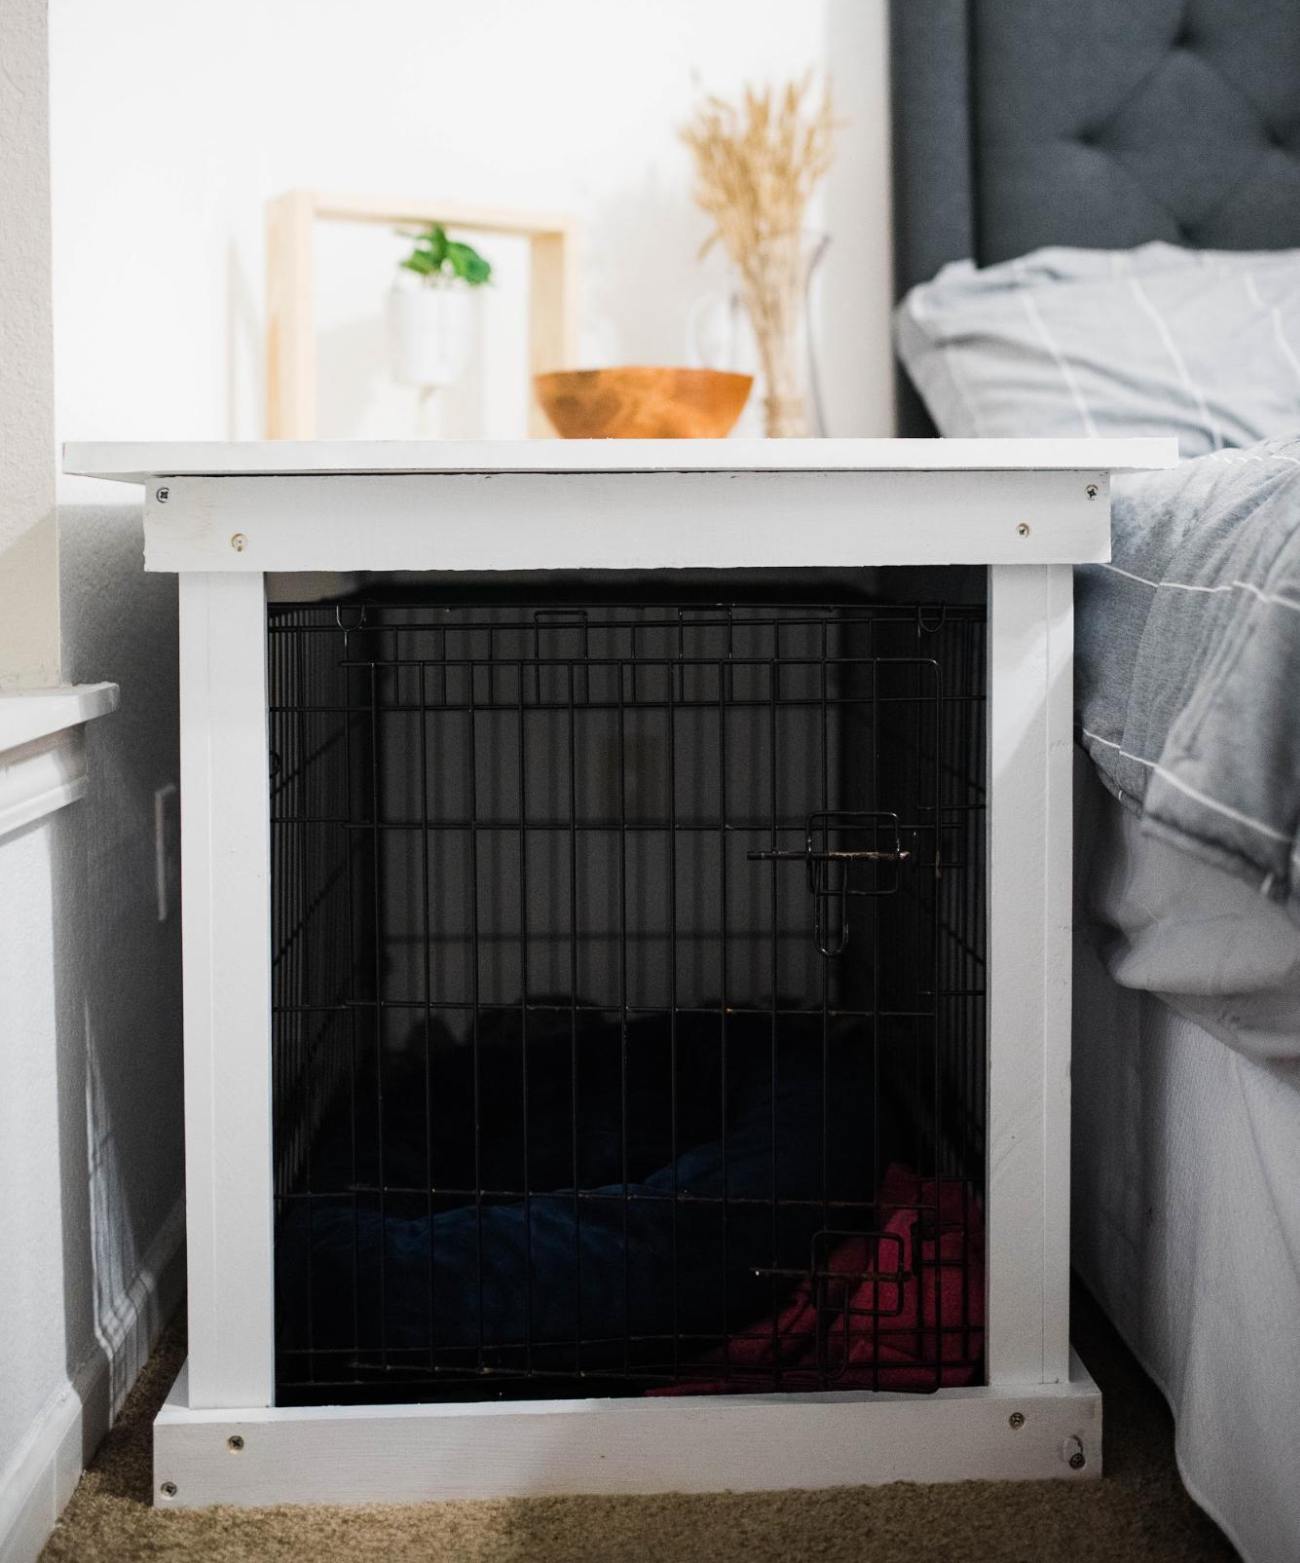
Now it fits perfectly in the alotted alcove, and Kevin (yes my dog has a human name) absolutely loves it. I can remove the lid for when I break down his kennel for travel and it makes things so much easier, and now I have gained some much needed table space!