Today we are featuring
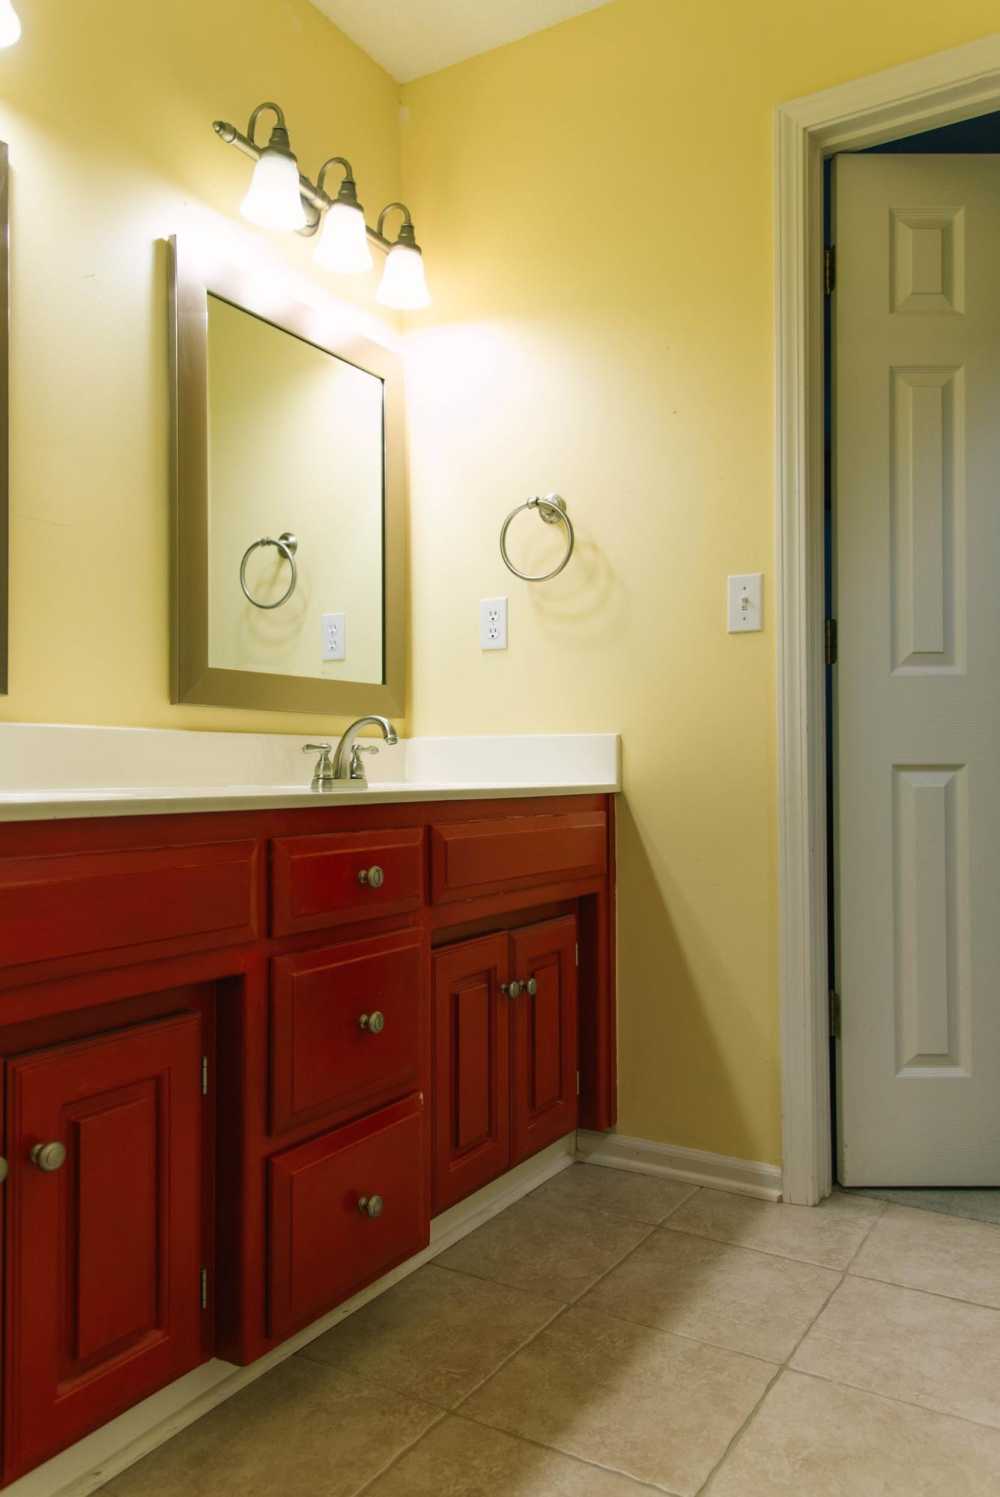
an incredible bathroom makeover! This bathroom originally was shared by two young boys, so the colors were wild and bold! However, when new owners bought it, they intended to use it for more of a guest bathroom, so they wanted to tone it down. A lot. As you can see below, the walls were painted a vivid yellow, and the cabinets were painted fire engine red. On top of this, there were soft light lightbulbs which made everything more yellow. (Read our past post about why you should switch from soft light to daylight bulbs.)
While the look is fun for children, it just didn’t suit the new owners’ needs. So, they decided to de-popcorn the ceiling themselves, paint the walls, and sand down the red cabinets and refinish them. The process of removing popcorn from a ceiling is a very messy one, so it is important that you prep the space first! Use protective sheeting to cover the walls, doors, counters and floor. This way, you have a much easier clean up when you are finished.
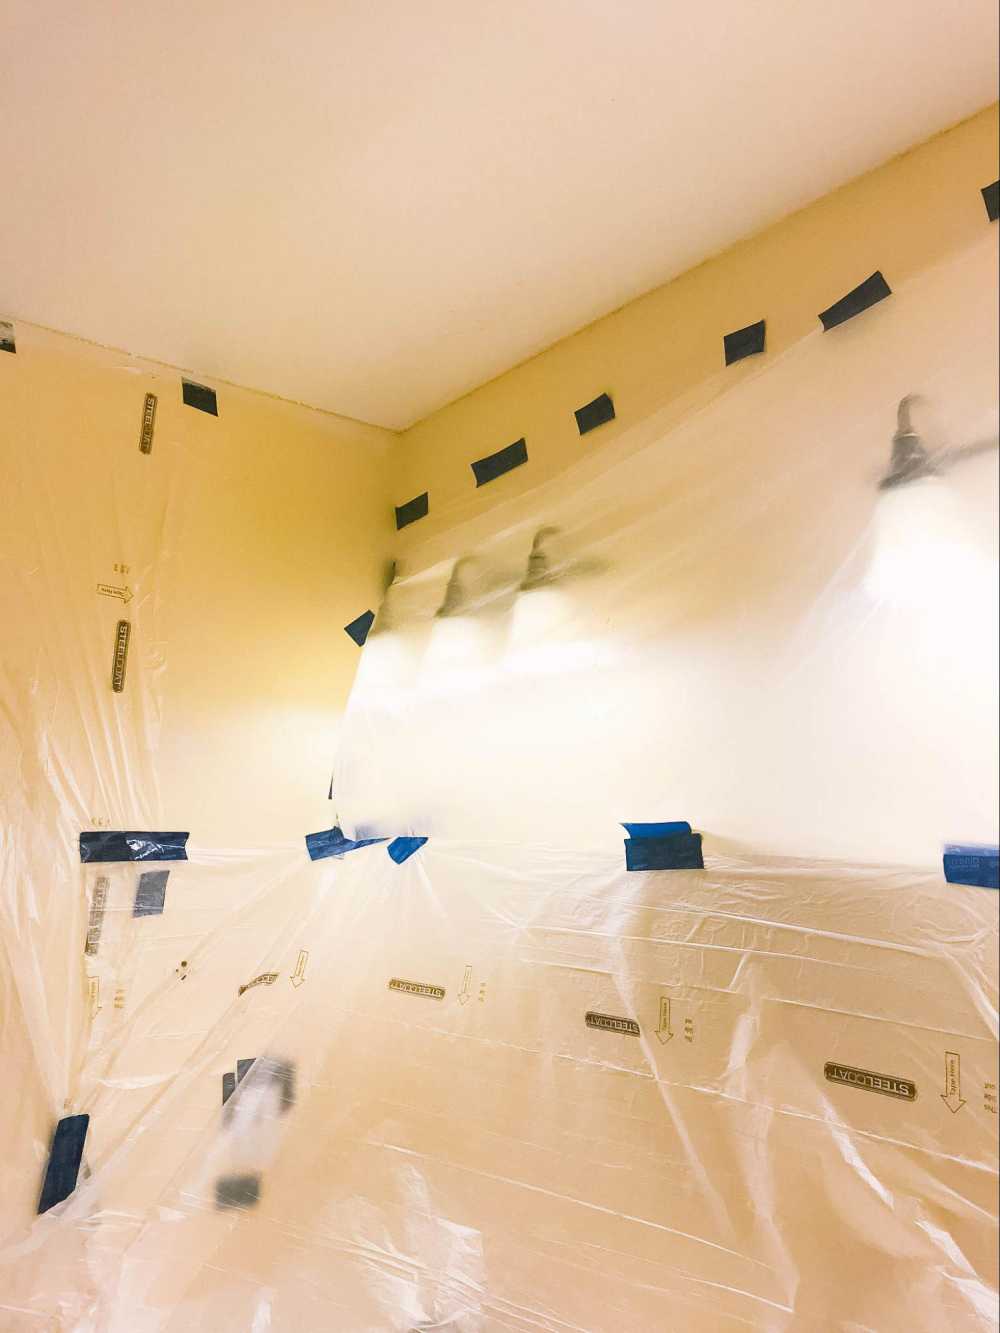
During this process, be sure to wear a dust mask. This will prevent you from inhaling any floating particles that will be falling from above. Using a ceiling scraper, you can decide whether or not to do a dry scrape, or use water to dampen the ceiling. This family found that using water helped the process for their ceiling. They used a mixture of water with one drop or two of dish soap. Then, they sprayed small sections with a spray bottle.
Once the ceiling was done, the first round of clean up began. It is important to completely clear the space of dust before painting the walls or cabinet as it can get stuck in the paint and effect the outcome. Once the space was completely cleaned, the cabinets were tackled. Because of the sort of paint that was used previously, the cabinets needed to be sanded down. The paint was some sort of acrylic craft paint as it peeled off in sheets once it was sanded.
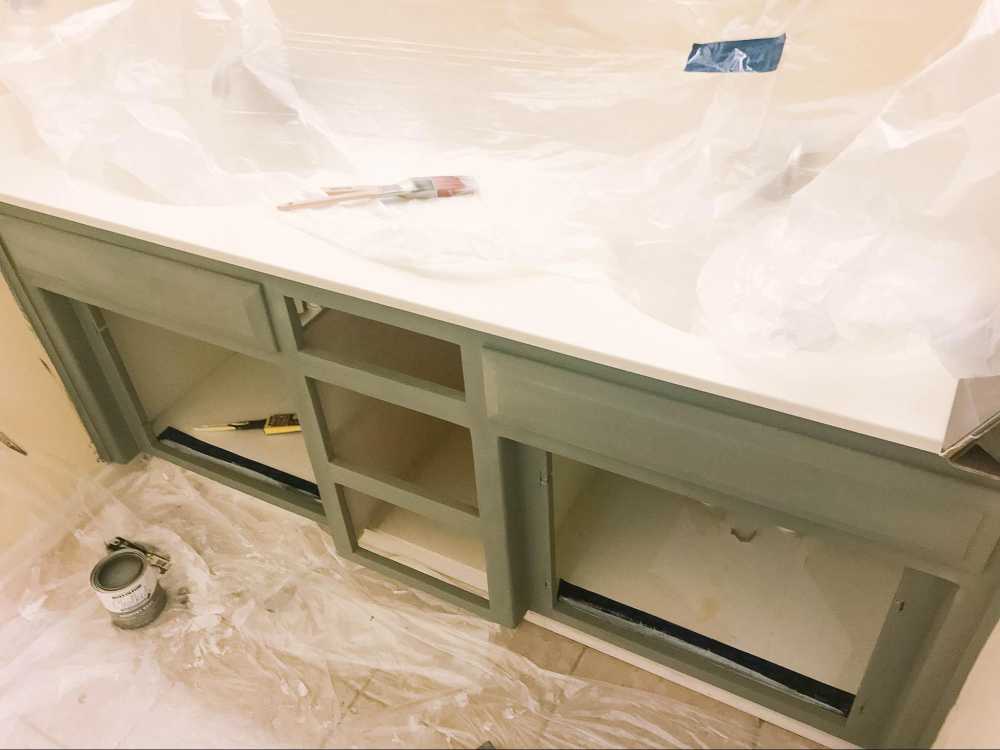
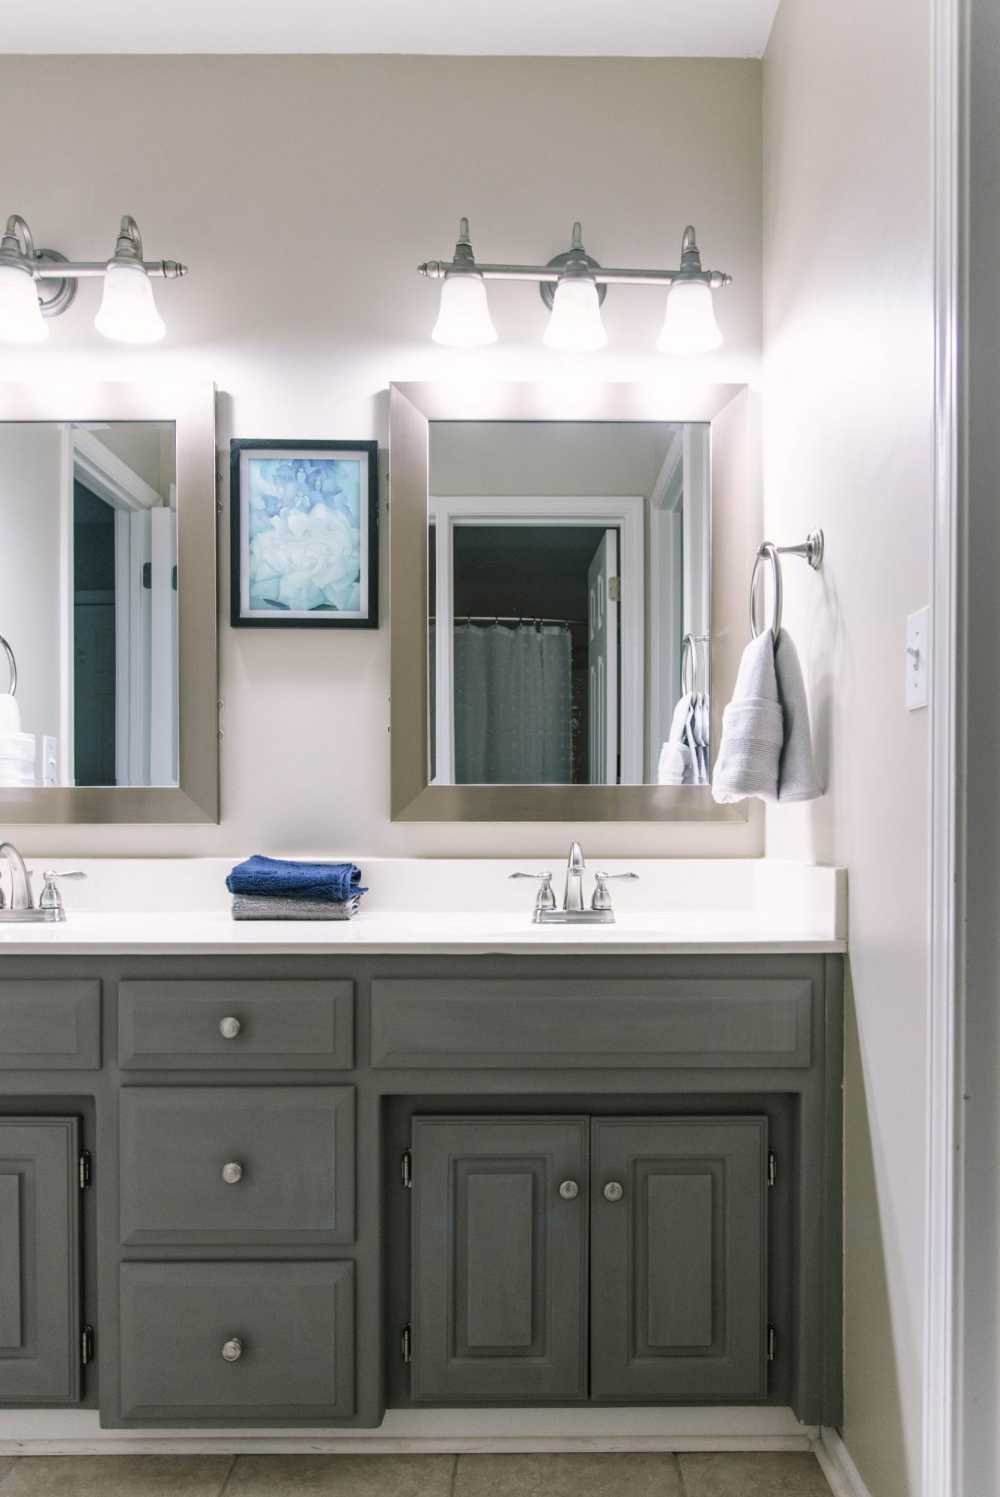
This cabinet is painted with Rustoleum’s Chalk Paint in Country Gray. They detached the drawers and cabinet doors to properly remove all of the hardware and sand down the front, back, and inside. Once the paint was applied, they made sure to seal it. It is important to do this in a bathroom because of the humidity and chances of water getting around.
Once the cabinets were painted and sealed, the moved on to paint the walls. They used a custom color-matched valspar paint from Sutherlands. Once the walls were painted and dried, they changed the lightbulbs, added all of their fixtures again, and had a brand-new classy bathroom for guests to use!