Now it is the first of November, which for a lot of people means the beginning of Christmas season. However, we still like to slow down and celebrate the remainder of fall. Thanksgiving is one of our favorite holidays, so we have a super simple project to help decorate for Thanksgiving dinner!
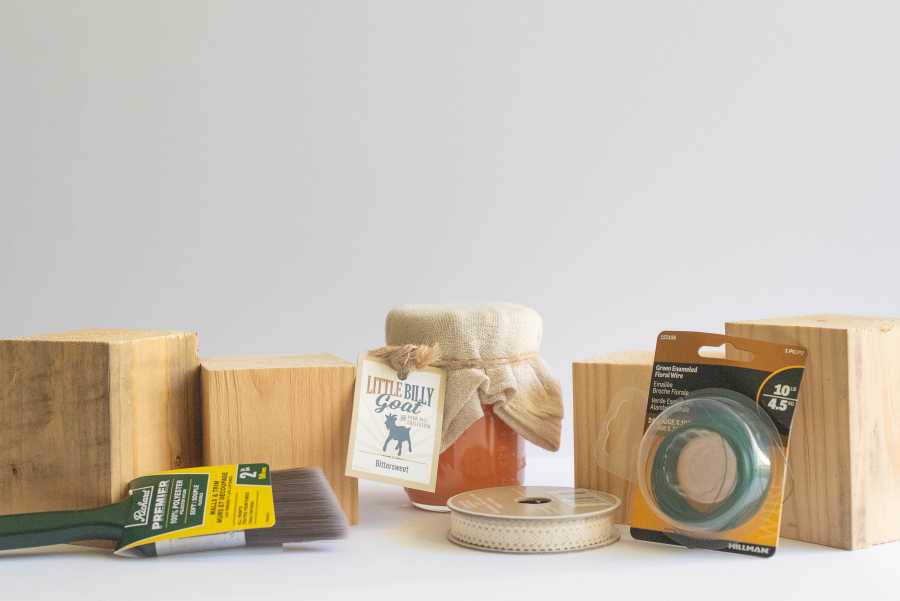
What you will need:
- 4x4 blocks in varying heights, or pallet blocks.
- Little Billy Goat Paint in the color Bittersweet
- Paintbrush
- Hot Glue gun
- Green floral wire
- Decorative ribbon
- Sticks
The best part about this project is that is super simple. Little Billy Goat paint dries really quickly, so the whole project can be completed in under 30 minutes!
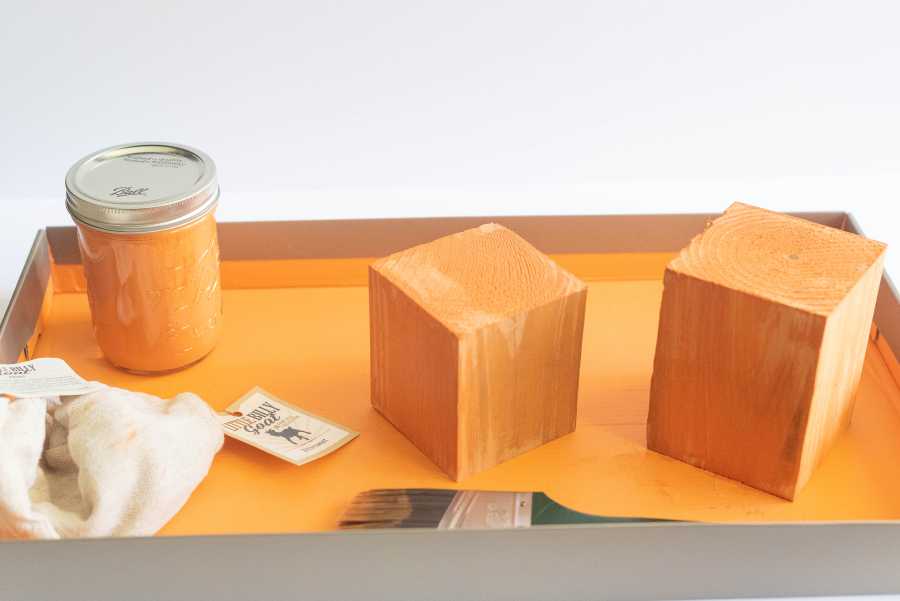
Step 1: I painted each block very lightly. I really liked the wood grain showing through because it resembled the natural lines that a pumpkin has. I used the bare minimum amount of paint needed to cover each side. Your hands WILL get messy doing this, but Little Billy Goat Paint comes off of skin and clothes with just soap and water. Also, thanks to Little Billy Goat Paint, I had no extra prep-work to do! Just apply and go!

Step 2: I cut about six inches of green garden wire. I folded the wire in half then twisted it. I wanted the wire to be a little bit thicker, so twisting it together helped make it stand out more. It also gave this really awesome vine look. I then curled the twisted segments of wire around a pencil to give it a nice spiral.
Step 3: Next, I went outside and grabbed just a handful of random sticks, and cut them down to about an inch! These will serve as the “stem” of the pumpkin.
Step 4: I cut my ribbon to go perfectly around the base of the stem. I used a small dot of hot glue to make sure it was secure. This just adds a cute flair to your pumpkins. Yeah, we are extra when it comes to fall.

Step 5: I used the hot glue to add a small dot to the center ring of my block. I liked that the rings were off center, so I just used that to my advantage.
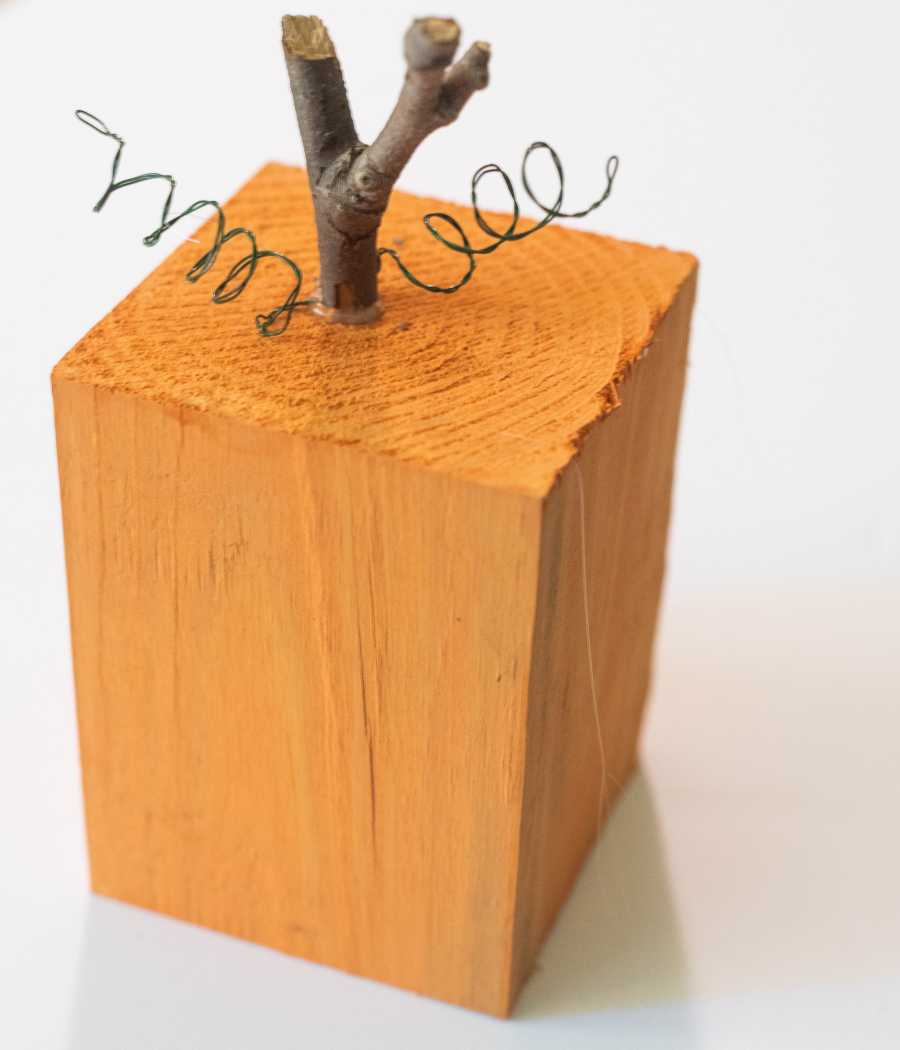
Step 6: I added two of my twisted “vines” to the hot glue dot. I wanted them sticking out in different directions, so I angled them carefully, then used my wooden stem to press them down into the glue.
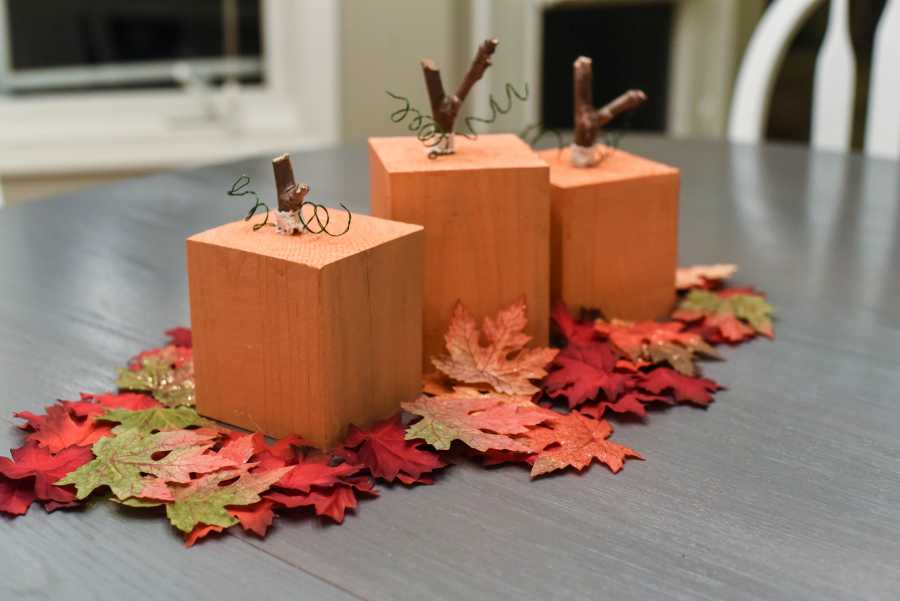
Step 7: Finally, I added just a little extra glue to glue the stem down in place. I added a little extra glue to the sides, just to make sure it was extra secure! I let everything dry, and then I ended up with a really cute Thanksgiving centerpiece!